Multi-Factor Authentication
Multi-Factor Authentication (MFA) has emerged as a best practice for login security. In SCP, after you authenticate with your user name and password, you can set up additional "factors," or devices, that you must use to complete the log in process. In most cases, once it is set up, this just requires one or two additional clicks to complete the log in process.
Here is a list of the topics discussed in this document:
Password AuthenticationMFA Set Up for EmployeesAdding MFA DevicesEnabling MFA for Your AccountAdding a Second DeviceAdding a Device with an Authenticator AppSetting the Default MFA DeviceLogging In with MFAPasskey Login ProcessAuthenticator App Login Process
Password Authentication
SCP requires you use a traditional user and password to log in, and this is always the first step when logging in. In SCP, your MFA devices do not replace traditional user name and password authentication. They are applied in addition to password authentication, to add an important layer of security.
To make it easier, a "Remember Me" option is available so you are not asking to log in more than once a week from the same device (make sure the device is not publicly accessible). In addition, if you ever lose the password, you can use the "Reset Your Password" link and a reset token will be emailed to you:

MFA Set Up for Employees
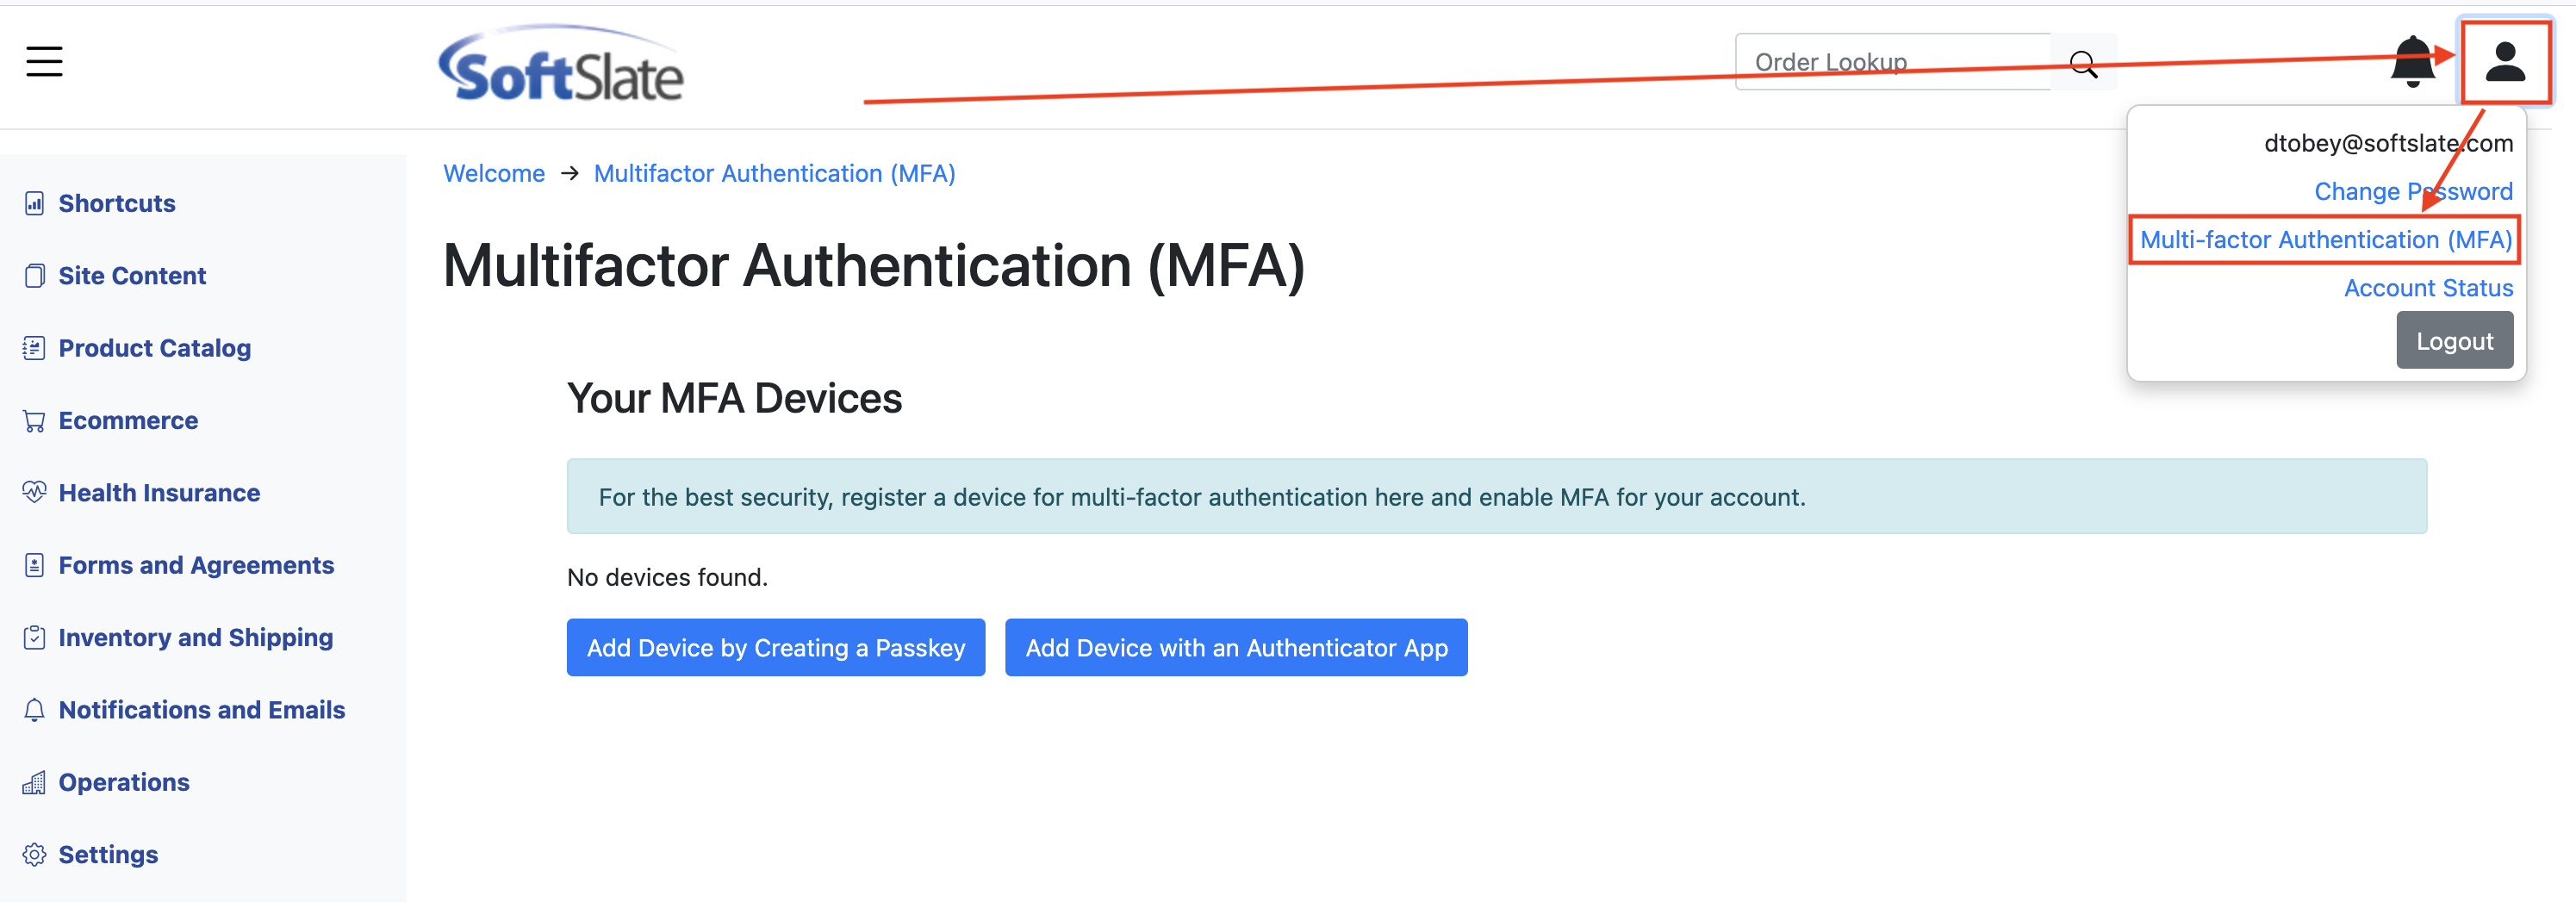
To register devices for multi-factor authentication, click the profile icon in the upper right of the administrator and then the Multi-factor Authentication link.
Adding MFA Devices
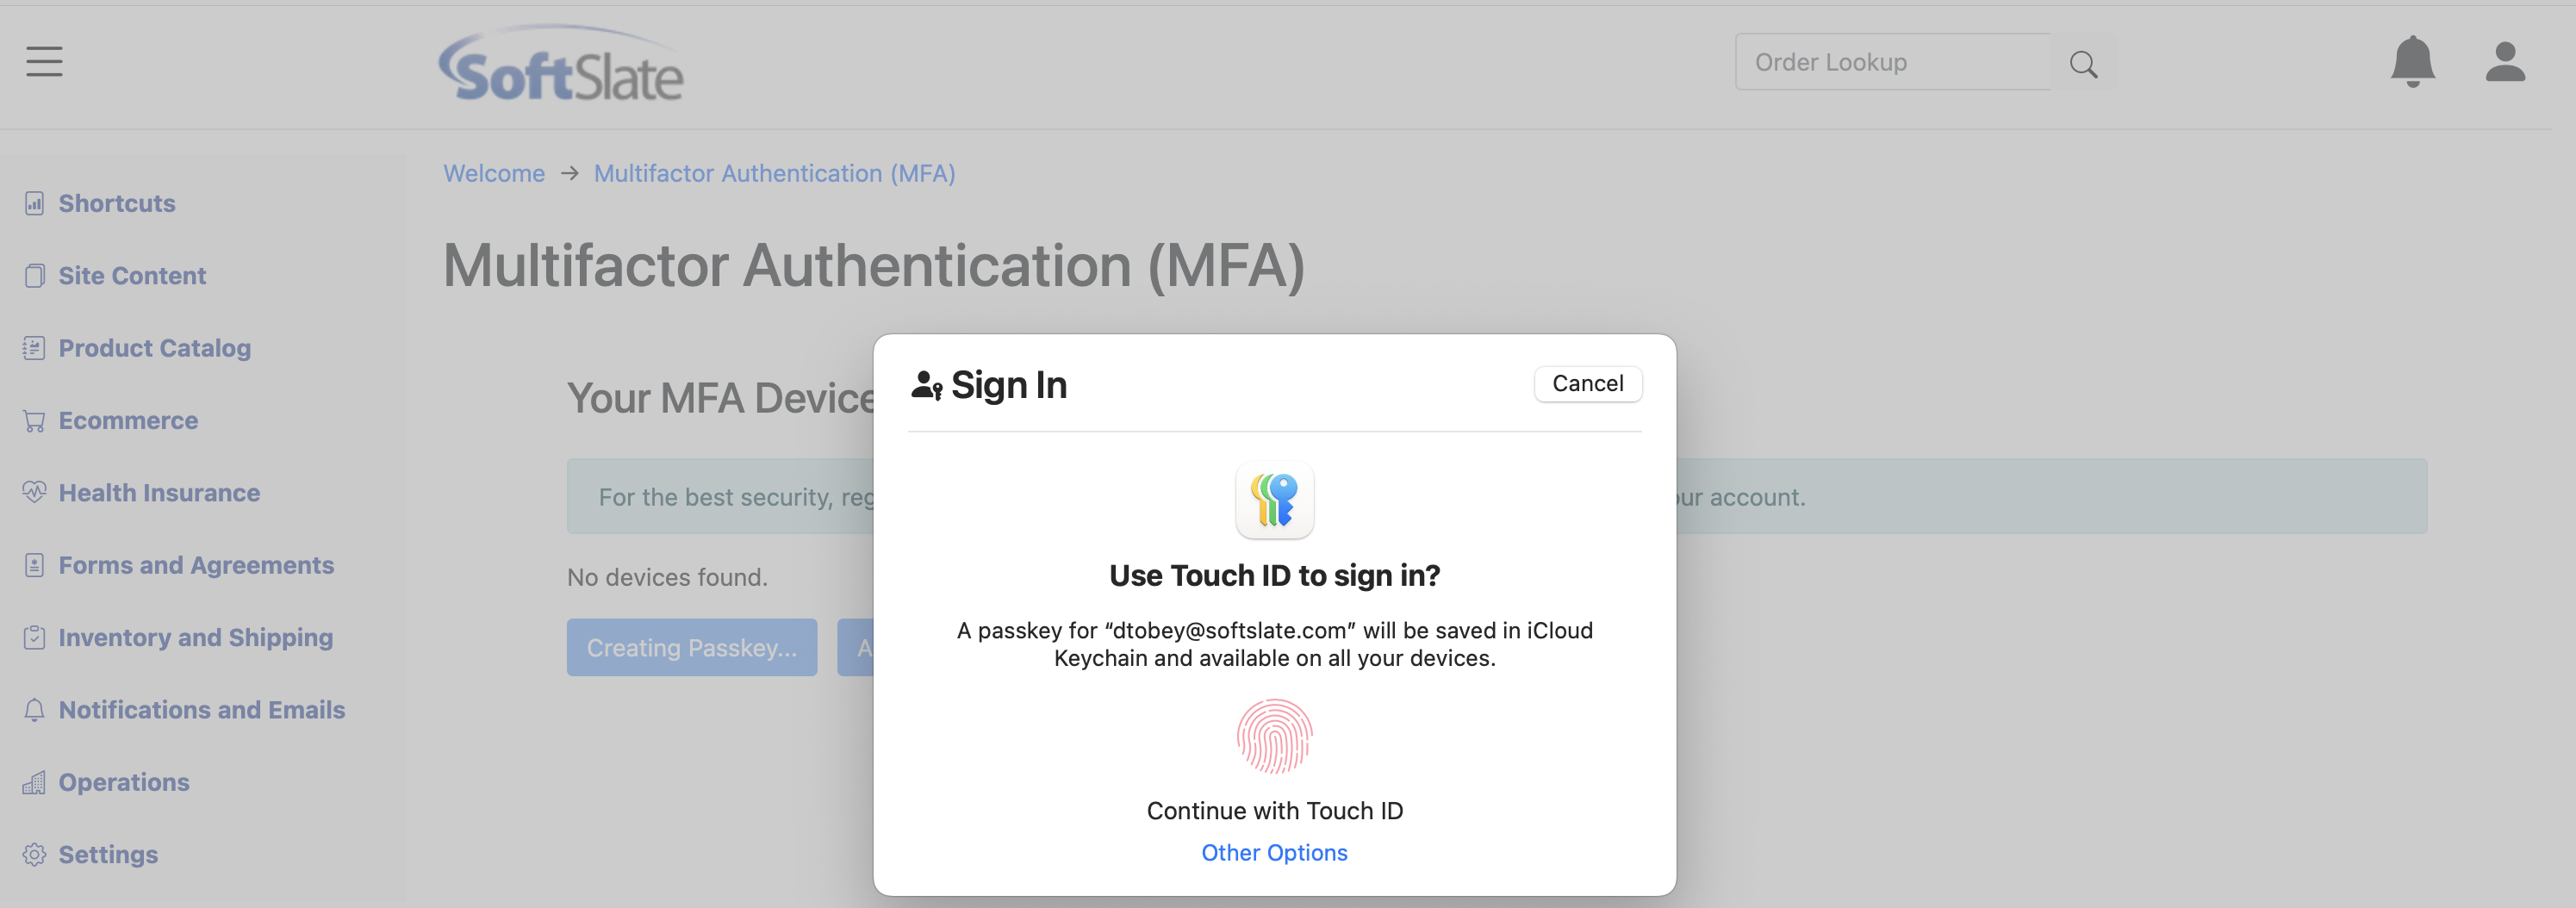
Use the buttons, Add Device by Creating a Passkey, and, Add Device with an Authenticator App, to create new "devices" to be used for multi-factor authentication. When you add a Passkey device, your browser should look something link this. Follow the browser prompts to register the passkey:
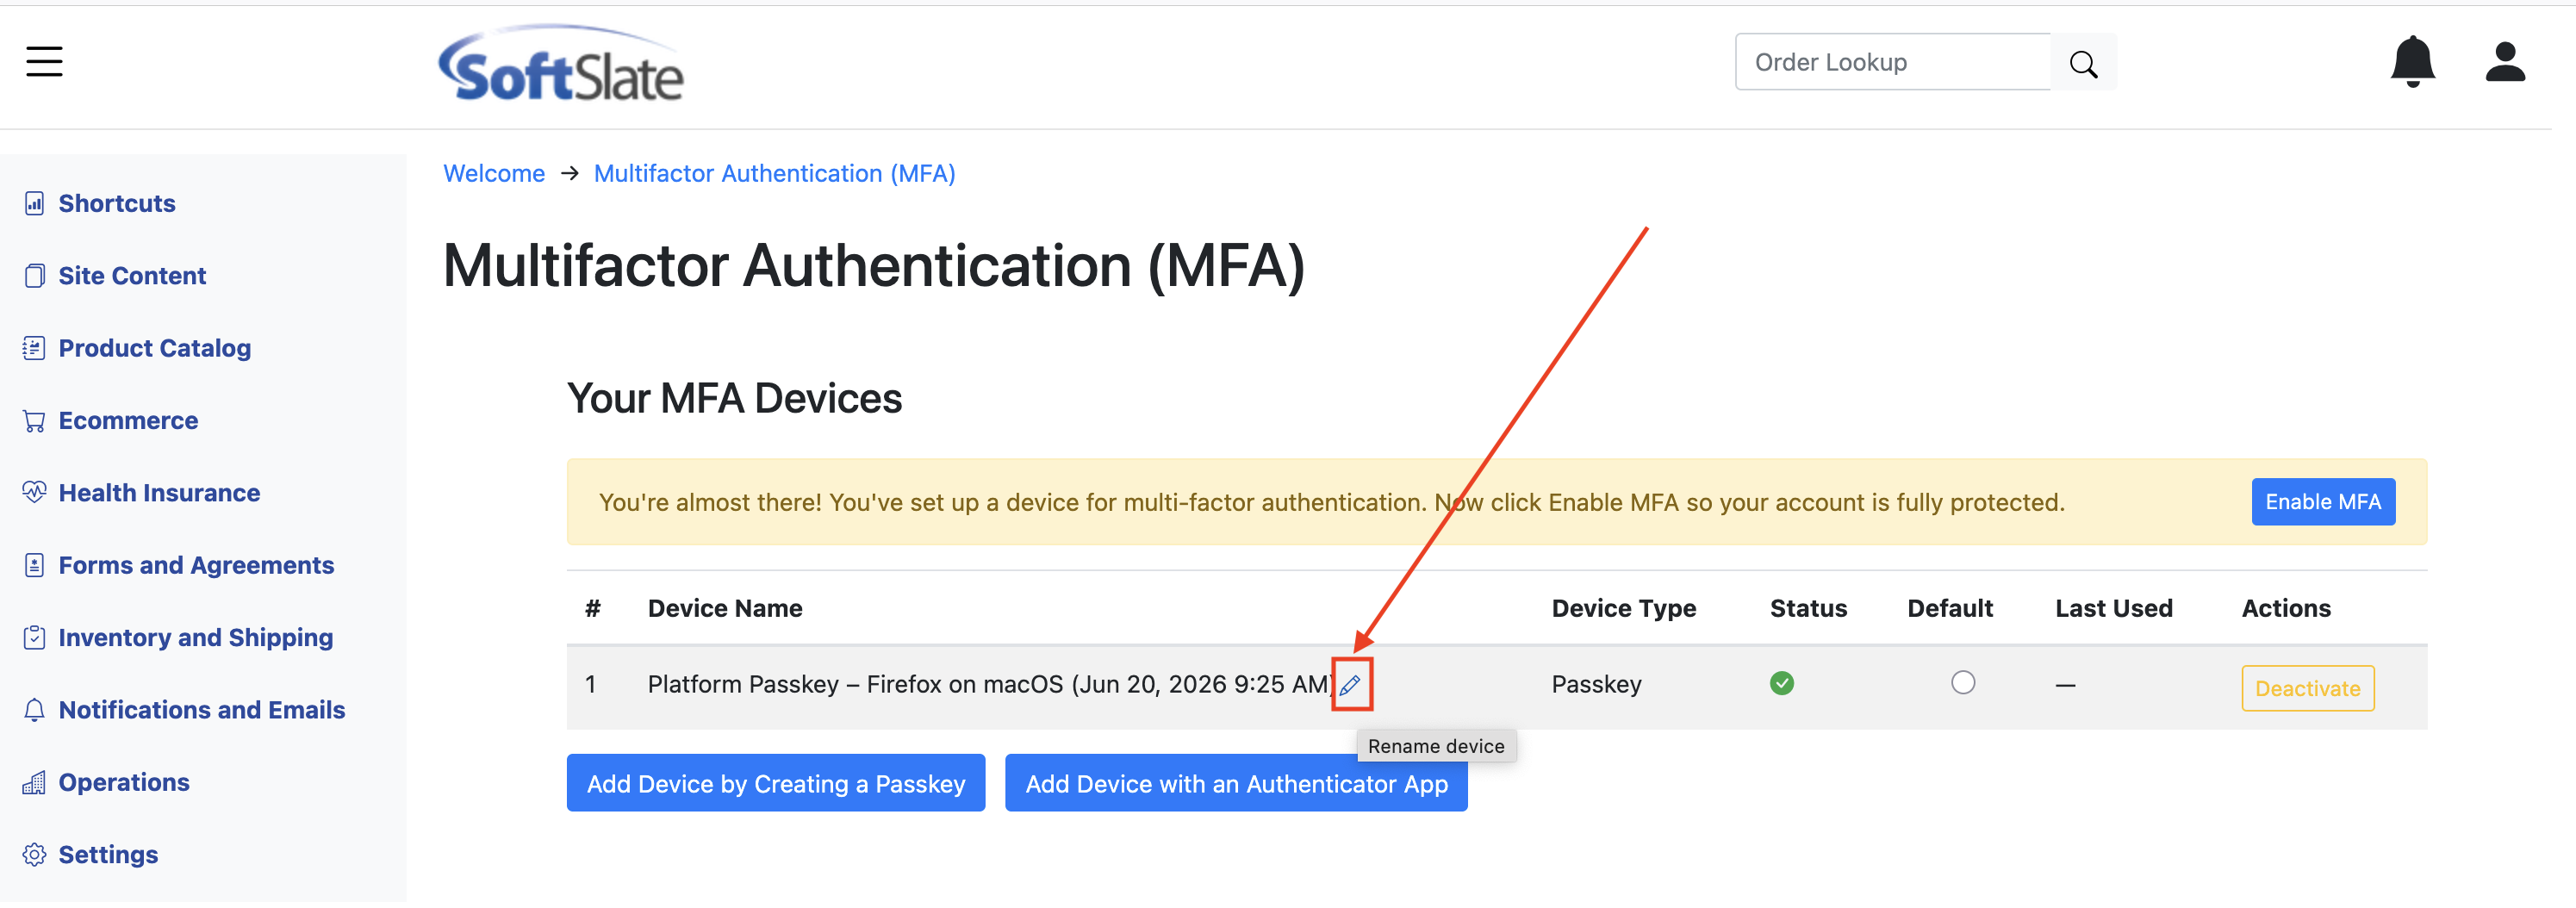
Once the device is added, if you wish, you can modify the Name so you can better identify it. Particularly with Authenticator App devices, it can be helpful to name the device according to the phone model and the specific app being used. To change the name of the device simply click the pencil icon next to the name:
Enabling MFA for Your Account
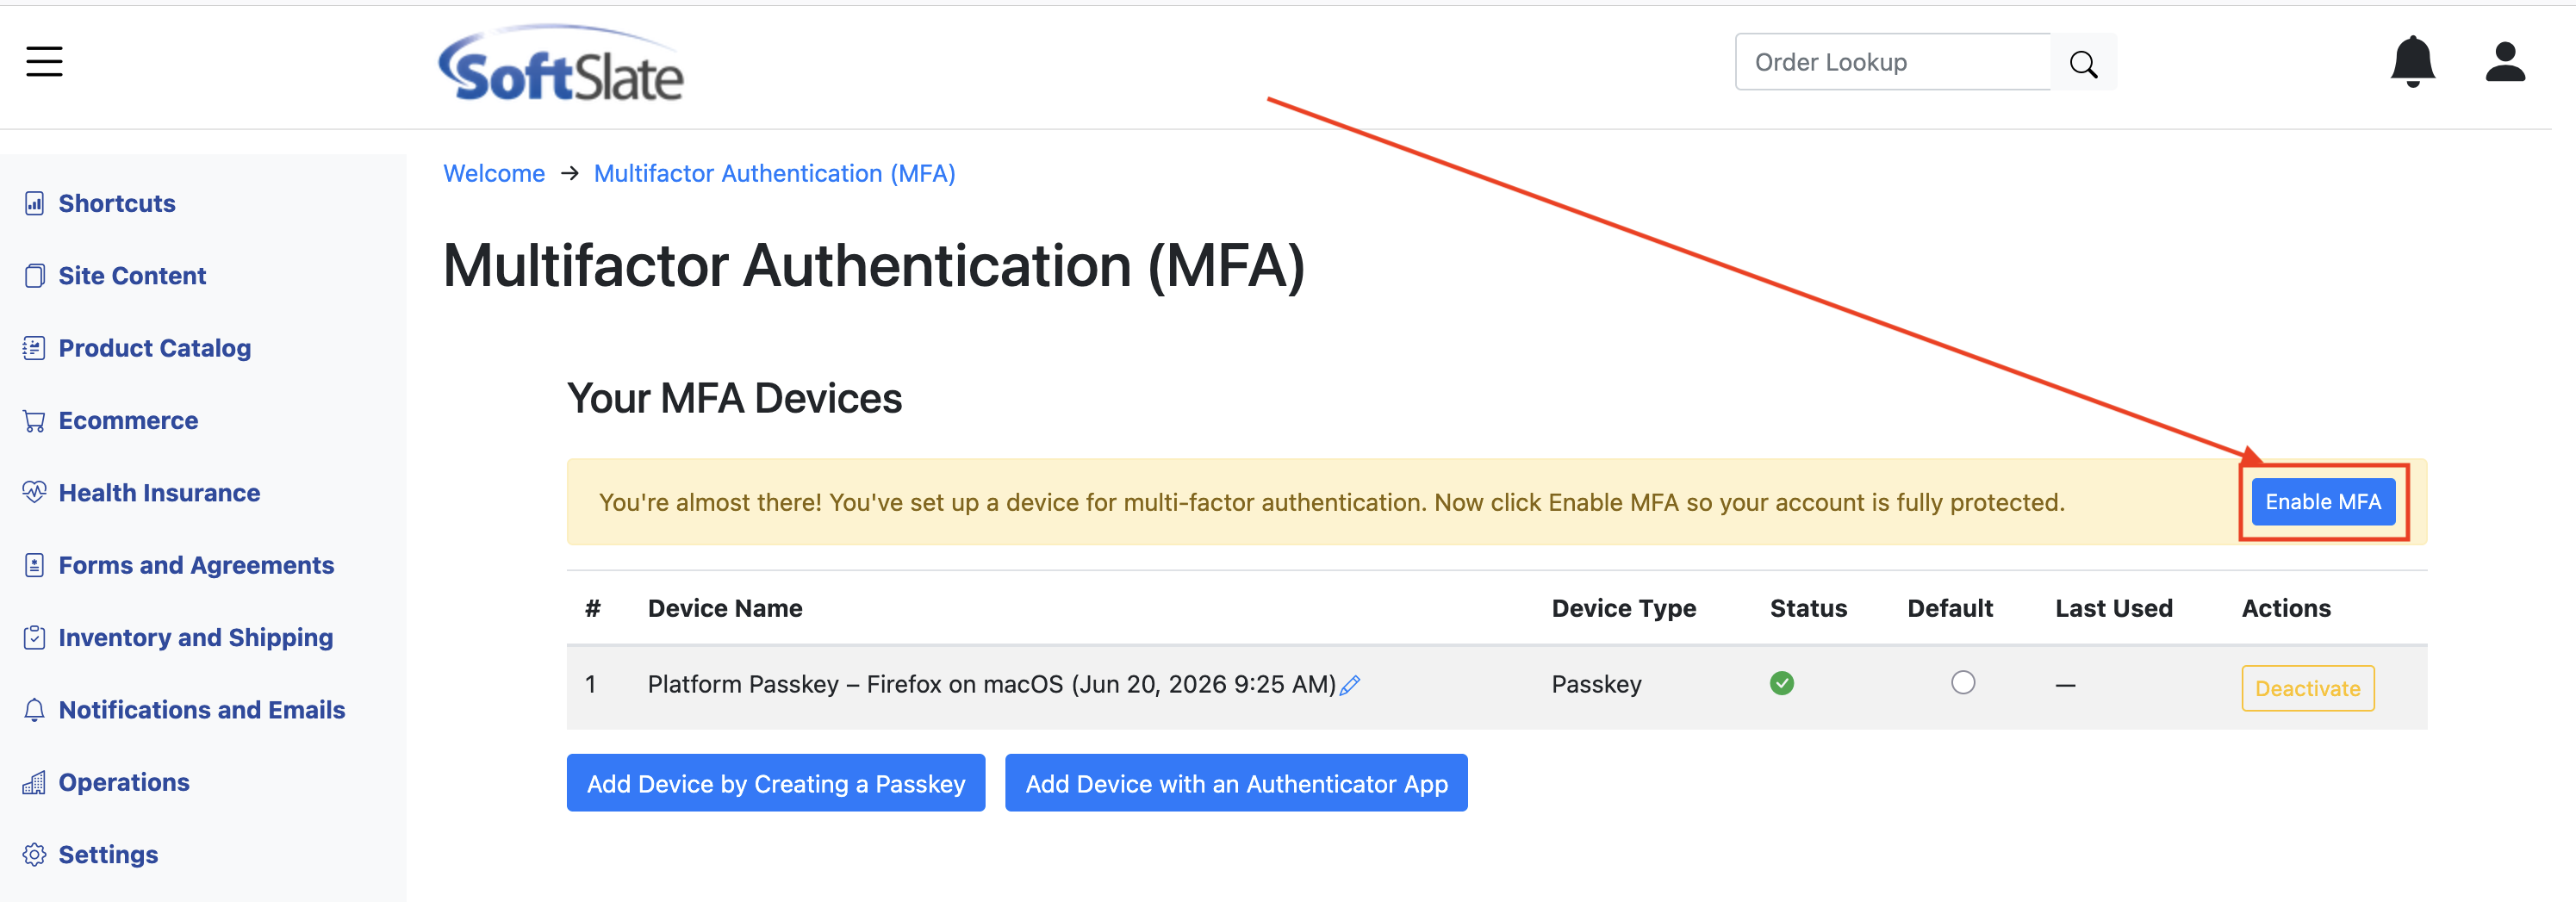
After you create your first device and optionally rename it, you must click the Enable MFA button to complete the set up process. Take care, because once you click this button, you will be required to use MFA going forward when you log in:
Adding a Second Device
Devices can easily be lost or replaced, so it's a good idea to create a second MFA option, so you are still able to get into your account. For example, you might set up a Passkey that is stored on your laptop. If your laptop is lost or stolen, or you don't happen to have it with you, it's a good idea to create another MFA option, for example, that can be used from your phone. The Authenticator App option is good for this:
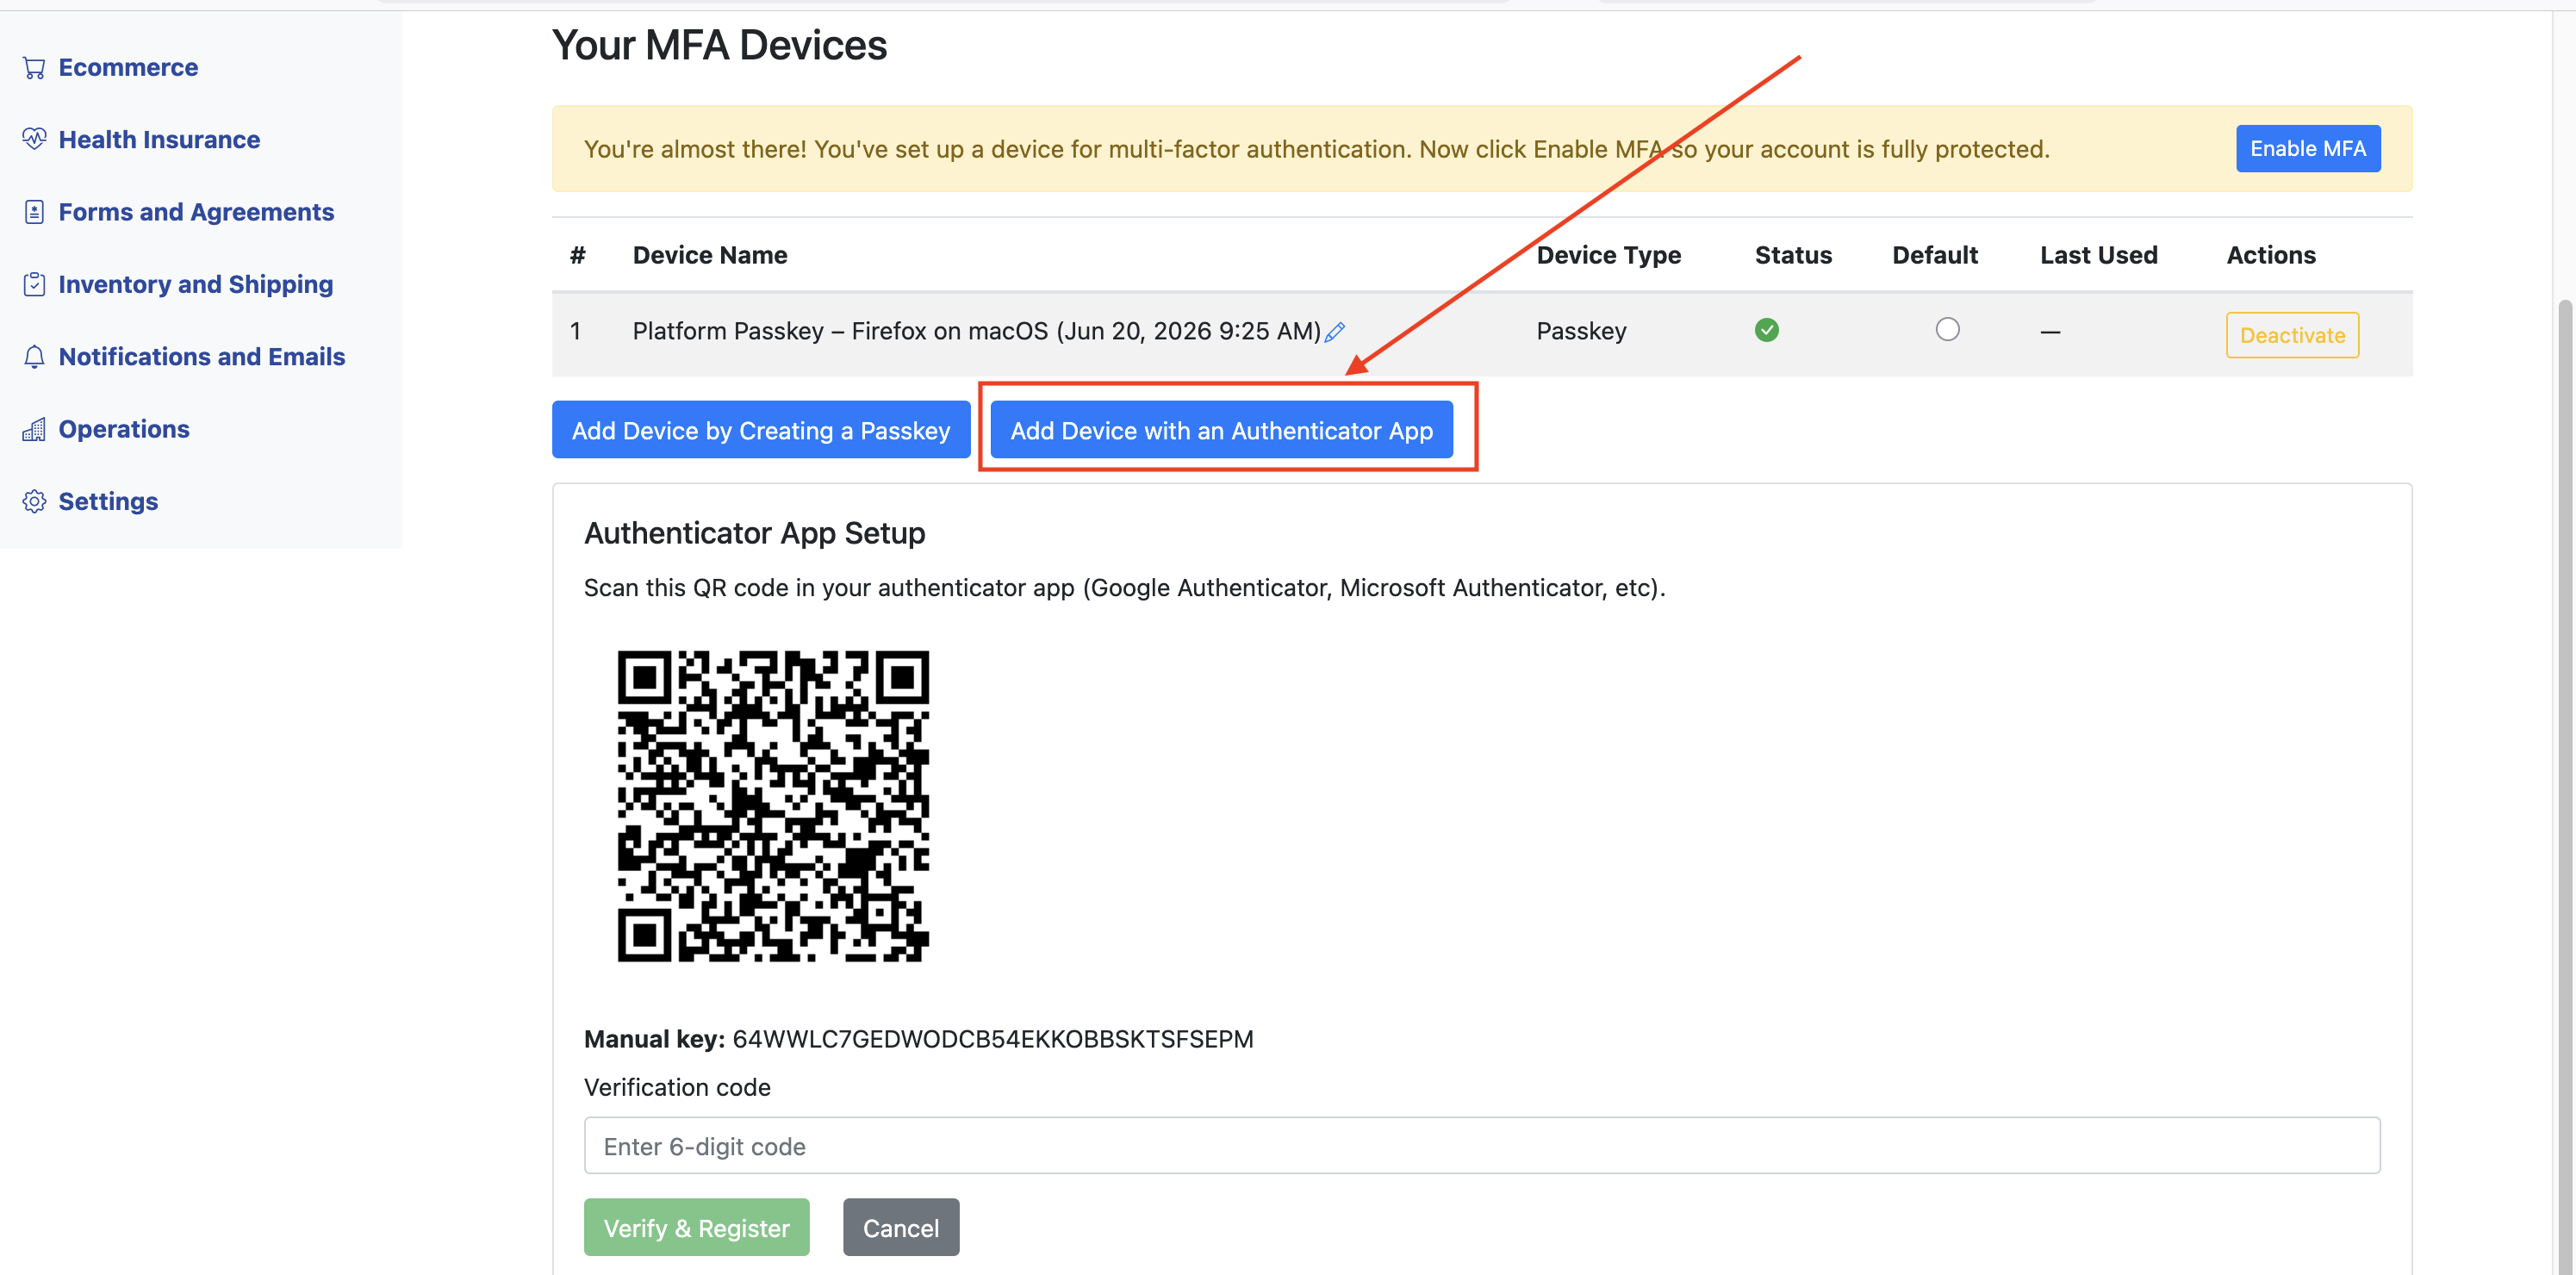
Adding a Device with an Authenticator App
On your phone (or other device) install an authenticator app. The SCP MFA feature has been tested with Google Authenticator, Microsoft Authenticator, and Duo Mobile.
Click the "Add Device with an Authenticator App" button as shown above.
Scan the QR code using the authenticator app on your phone.
Enter the 6-digit code shown on your phone, into the SCP set up screen shown above.
Setting the Default MFA Device
After setting up a second device, it can useful to tell the system which one to use as the "default" device. When you log in, the system will forward you immediately to the default device to complete multi-factor authentication:
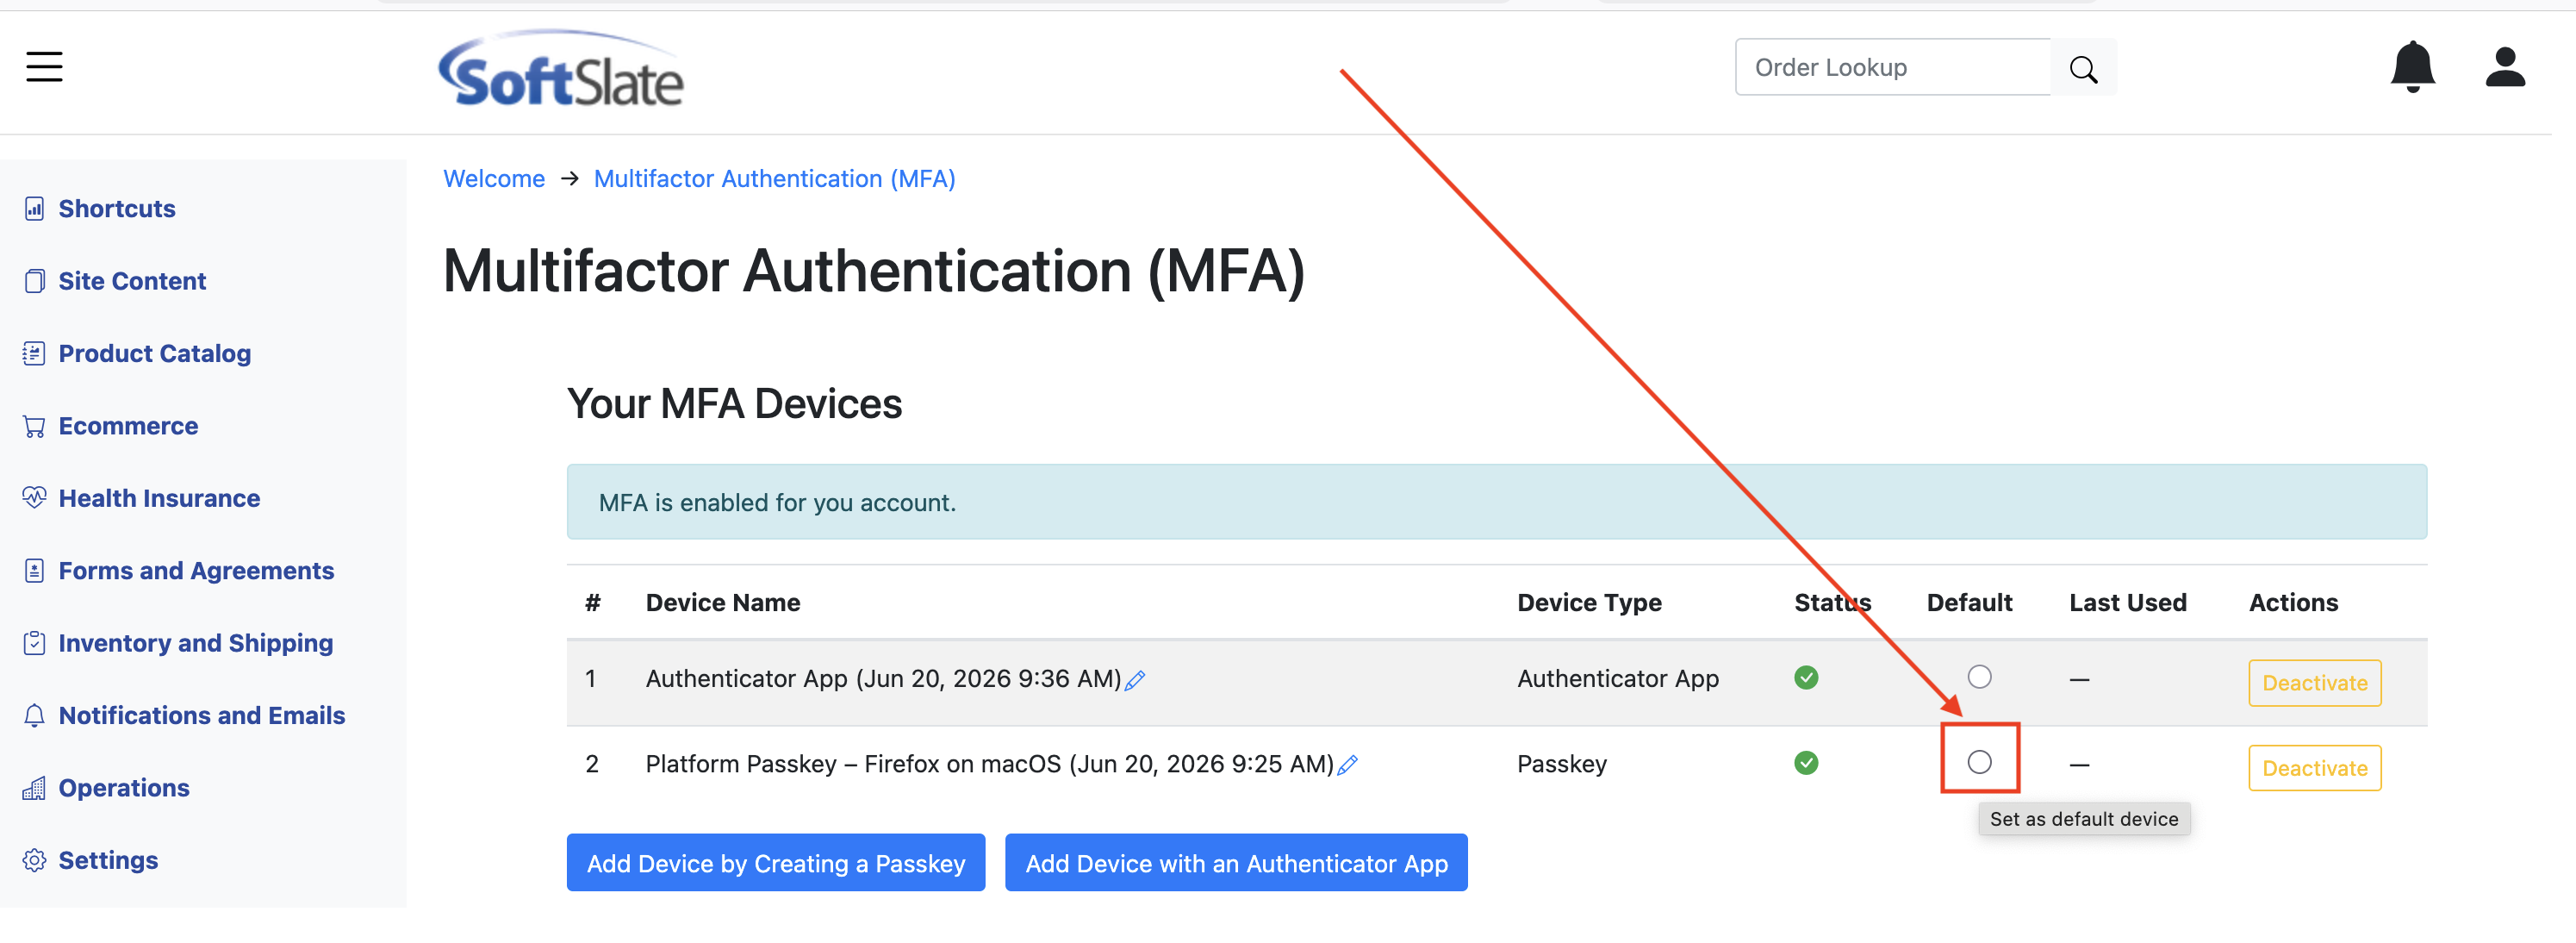
Passkey authentication is generally faster and easier to use, so we recommend setting up at least one Passkey device, and one Authenticator App device, and then choosing the Passkey as the default device.
Logging In with MFA
Passkey Login Process
After entering your user name and password successfully, if your default device is Passkey authentication, you should see something like this:

From here, if your device supports fingerprint authentication, usually you can just touch your fingerprint sensor to login. In other cases, you can simply click the passkey to complete the log in.
If Passkey authentication does not work, or you are not on the device that you used to set it up, and you have another device set up, you can click Cancel in the Passkey dialog box and click "Use Another Option". This will show you the list of the other devices you've set up:

Authenticator App Login Process
If you chose to log in with an authenticator app, you'll see the following screen. You'll need to open the authenticator app on the device you used during the set up, select the account you're logging into, and enter the 6-digit code that is shown: