Administrator Order Entry and Management
Those sites with a customer-facing ecommerce presence normally collect orders from customers themselves. However, SCP also provides full access in the administrator for employees both to create new orders, and manage ones placed by customers. These features make it easy to enter orders on a customer's behalf, and make changes after an order is placed, such as adding and removing items, changing shipping, capturing payments, and more.
The Customer Service DashboardNew Order EntryThe Customer Service FormAdding, removing and editing order itemsChanging the shipping optionAdding fees and discountsAdding shipments with tracking numbers, and creating UPS labelsCapturing or voiding the payment for an orderSending or resending email notificationsOrder attachmentsFraud and Verifications
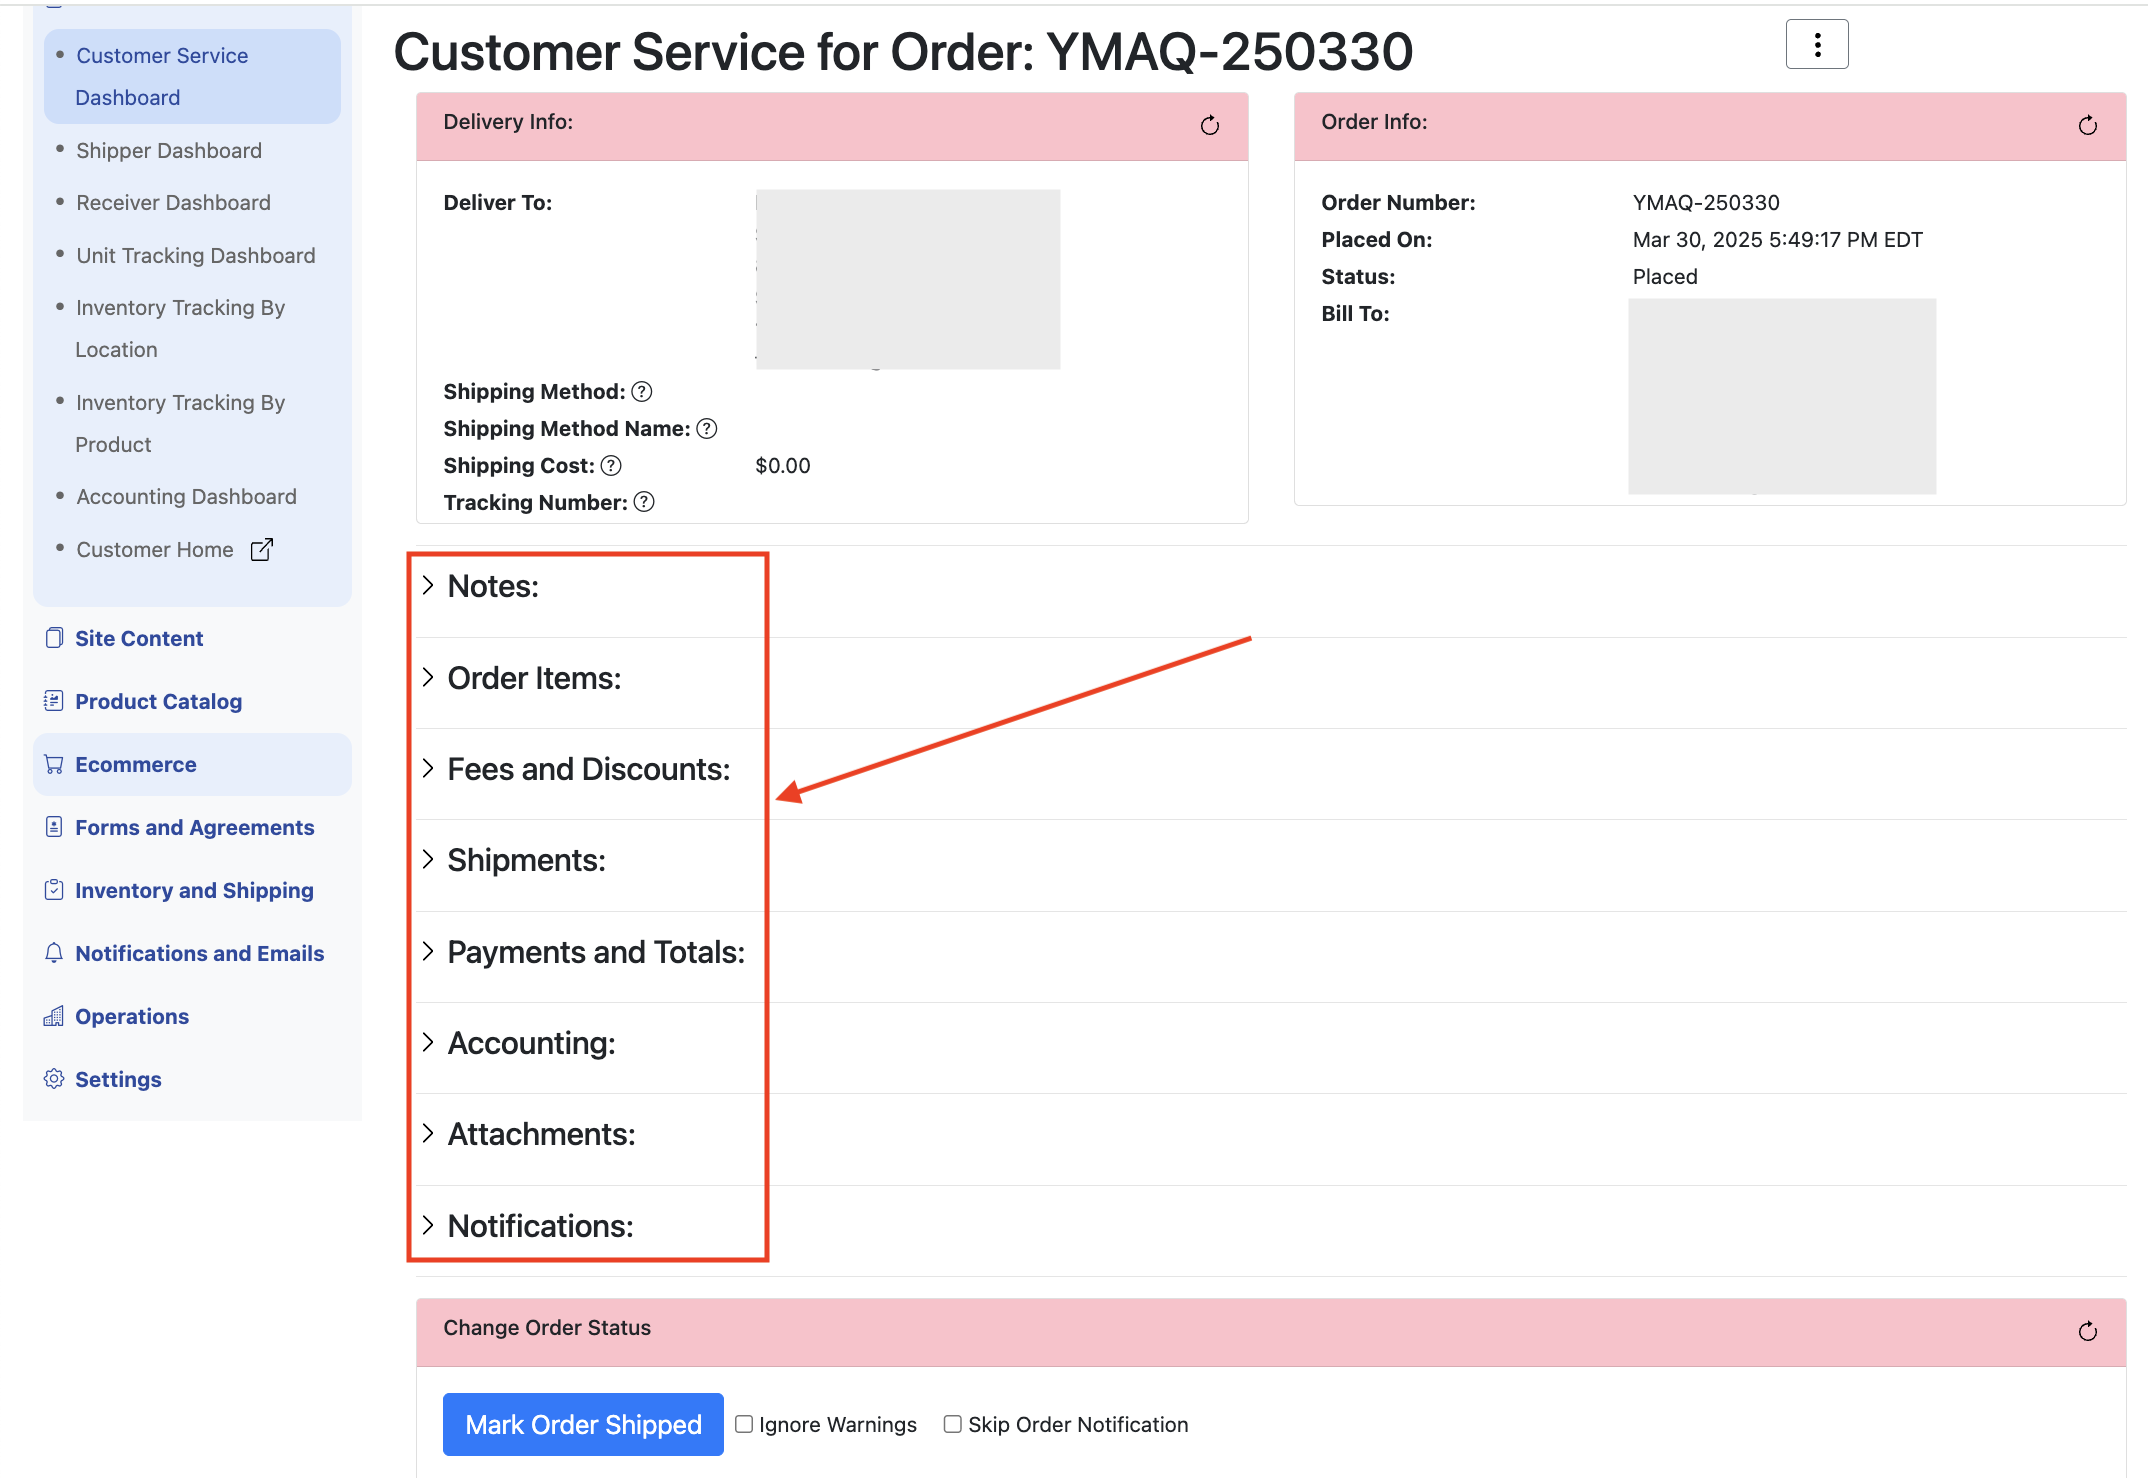
The Customer Service Dashboard
The go-to place in the adminstrator to view and manage incoming orders is the Customer Service Dashboard. It's accessible under either the Ecommerce menu or the Shortcuts menu in the administrator:
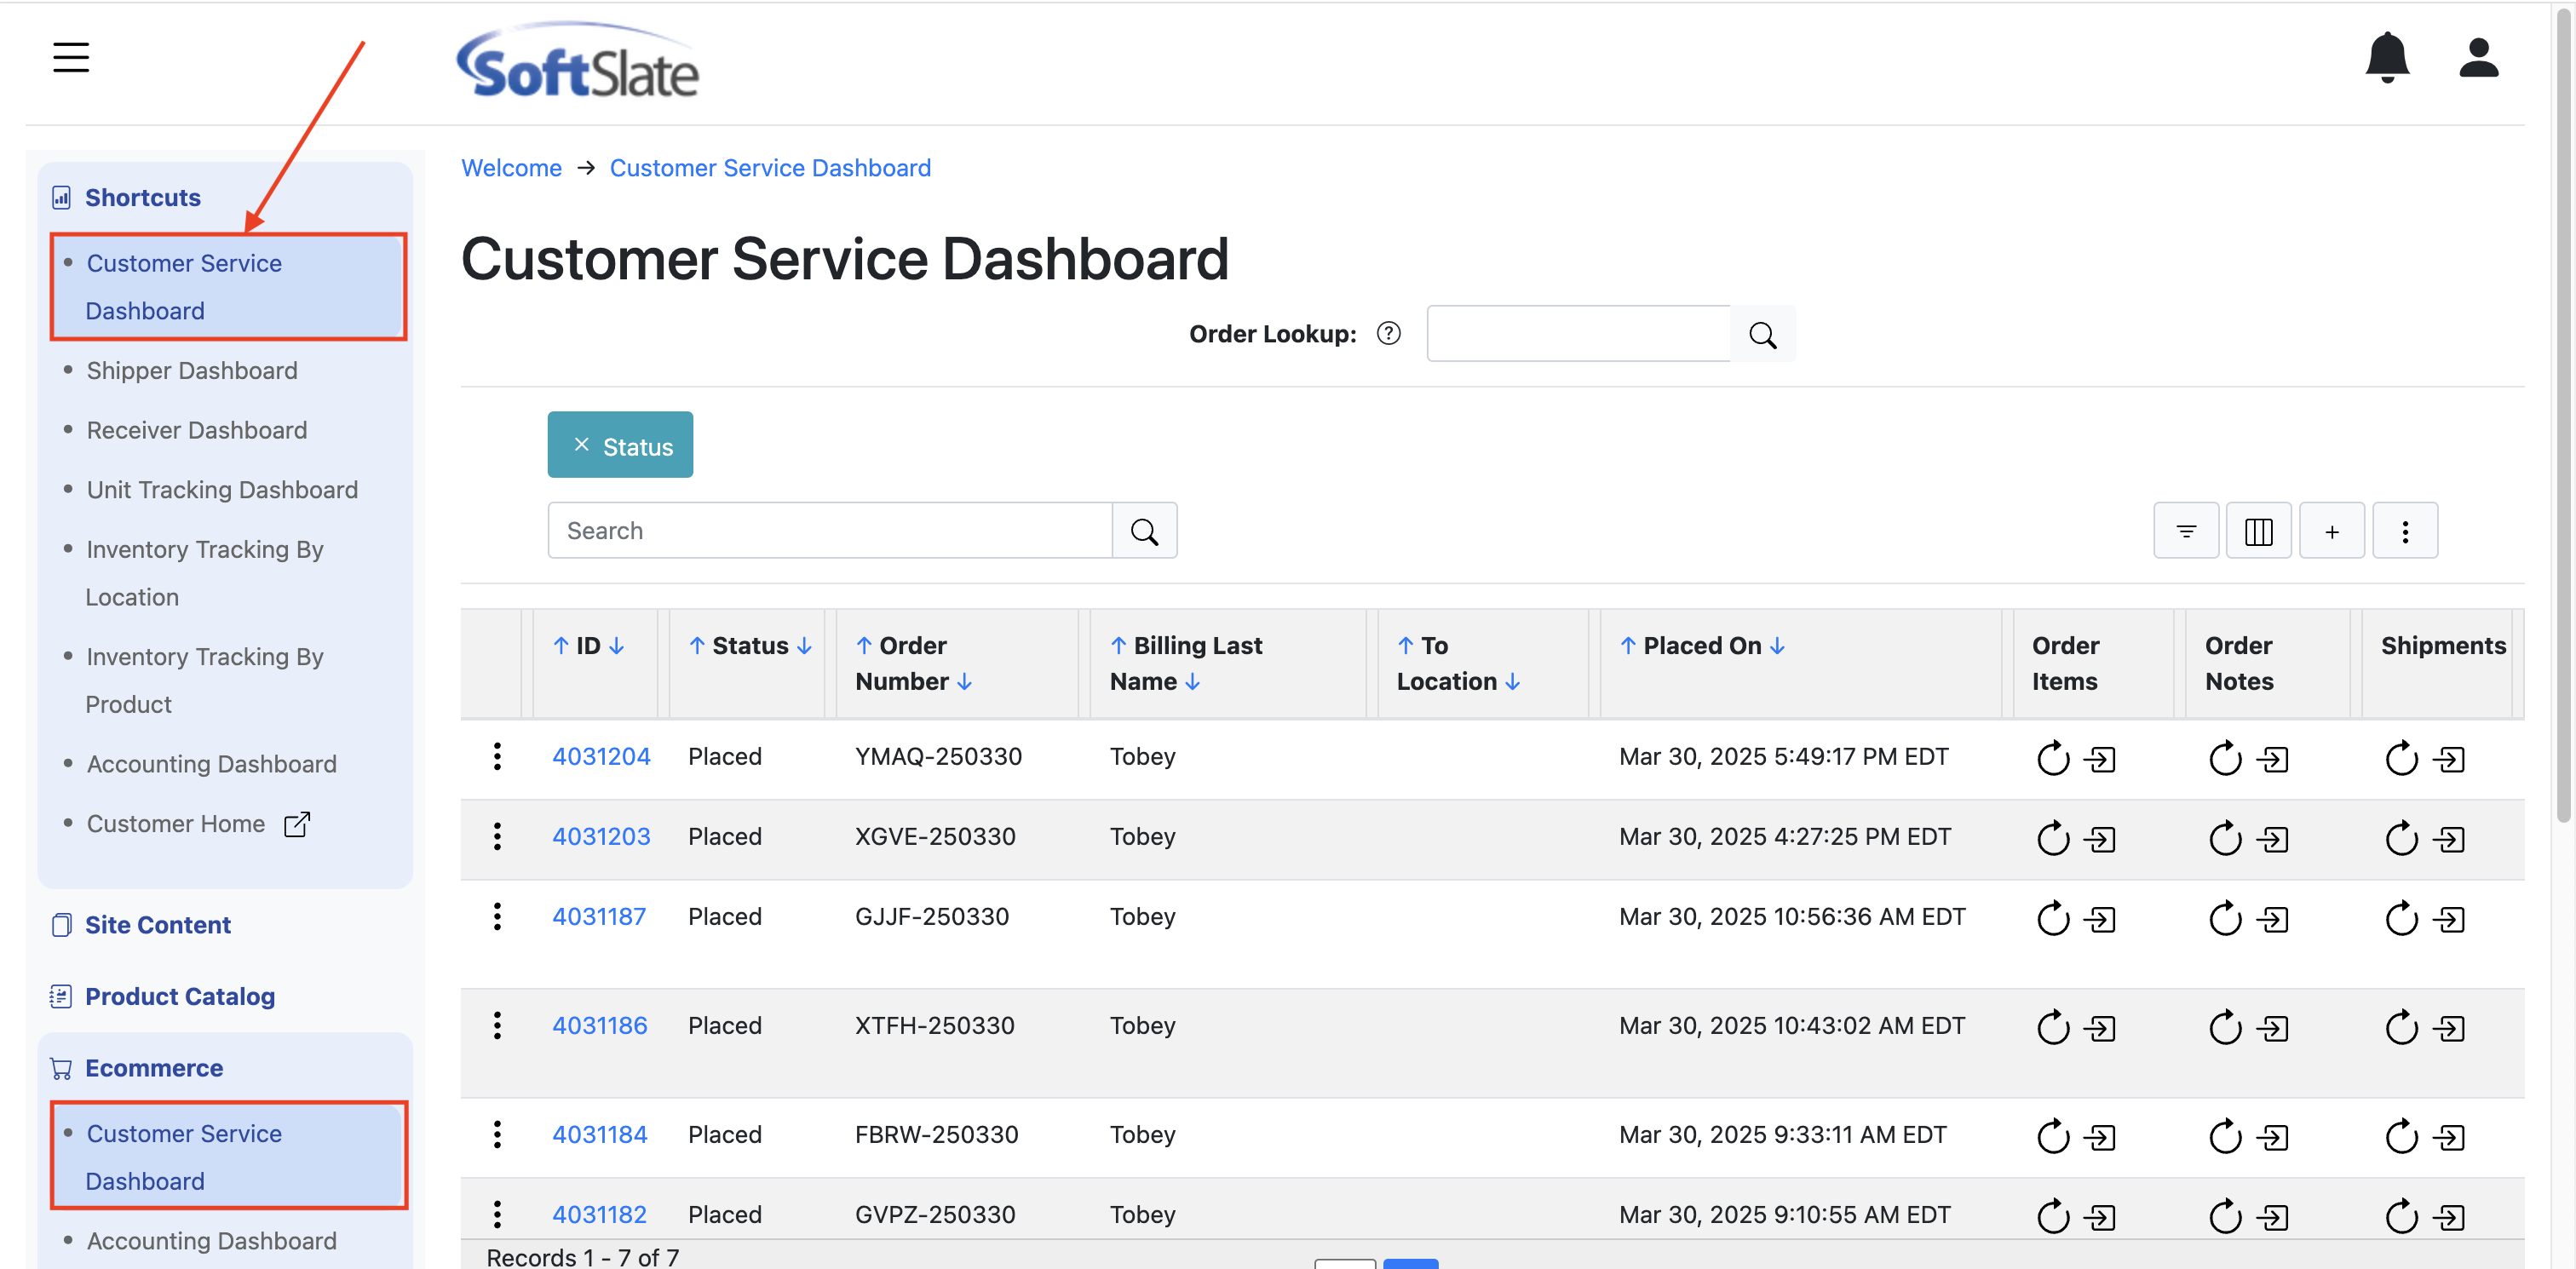
The list of orders is sorted by the dates the orders were placed so you see the most recent orders first. The Customer Service Dashboard is simply a specialize Order grid screen, and so it has all the features and functions of a grid screen in the administrator (such as filtering, searching, paging, etc.) For full details on how to use and work with grid screens, please visit the Administrator Grid Screens document.
The columns that the dashboad displays, along with other parameters, are controlled by a special Report called the Customer Service Dashboard Report. You can change the displayed columns, sorting, and other parameter by editing that report under Operations -> Reports.

New Order Entry
As an employee, you might need to enter a new order on a customer's behalf. One option is to go through the customer interface and place the order just as the customer would. A faster alternative, however, is to use the administrator's Create Order form. To use this form, click the plus icon from the Customer Service Dashboard or order grid screen: 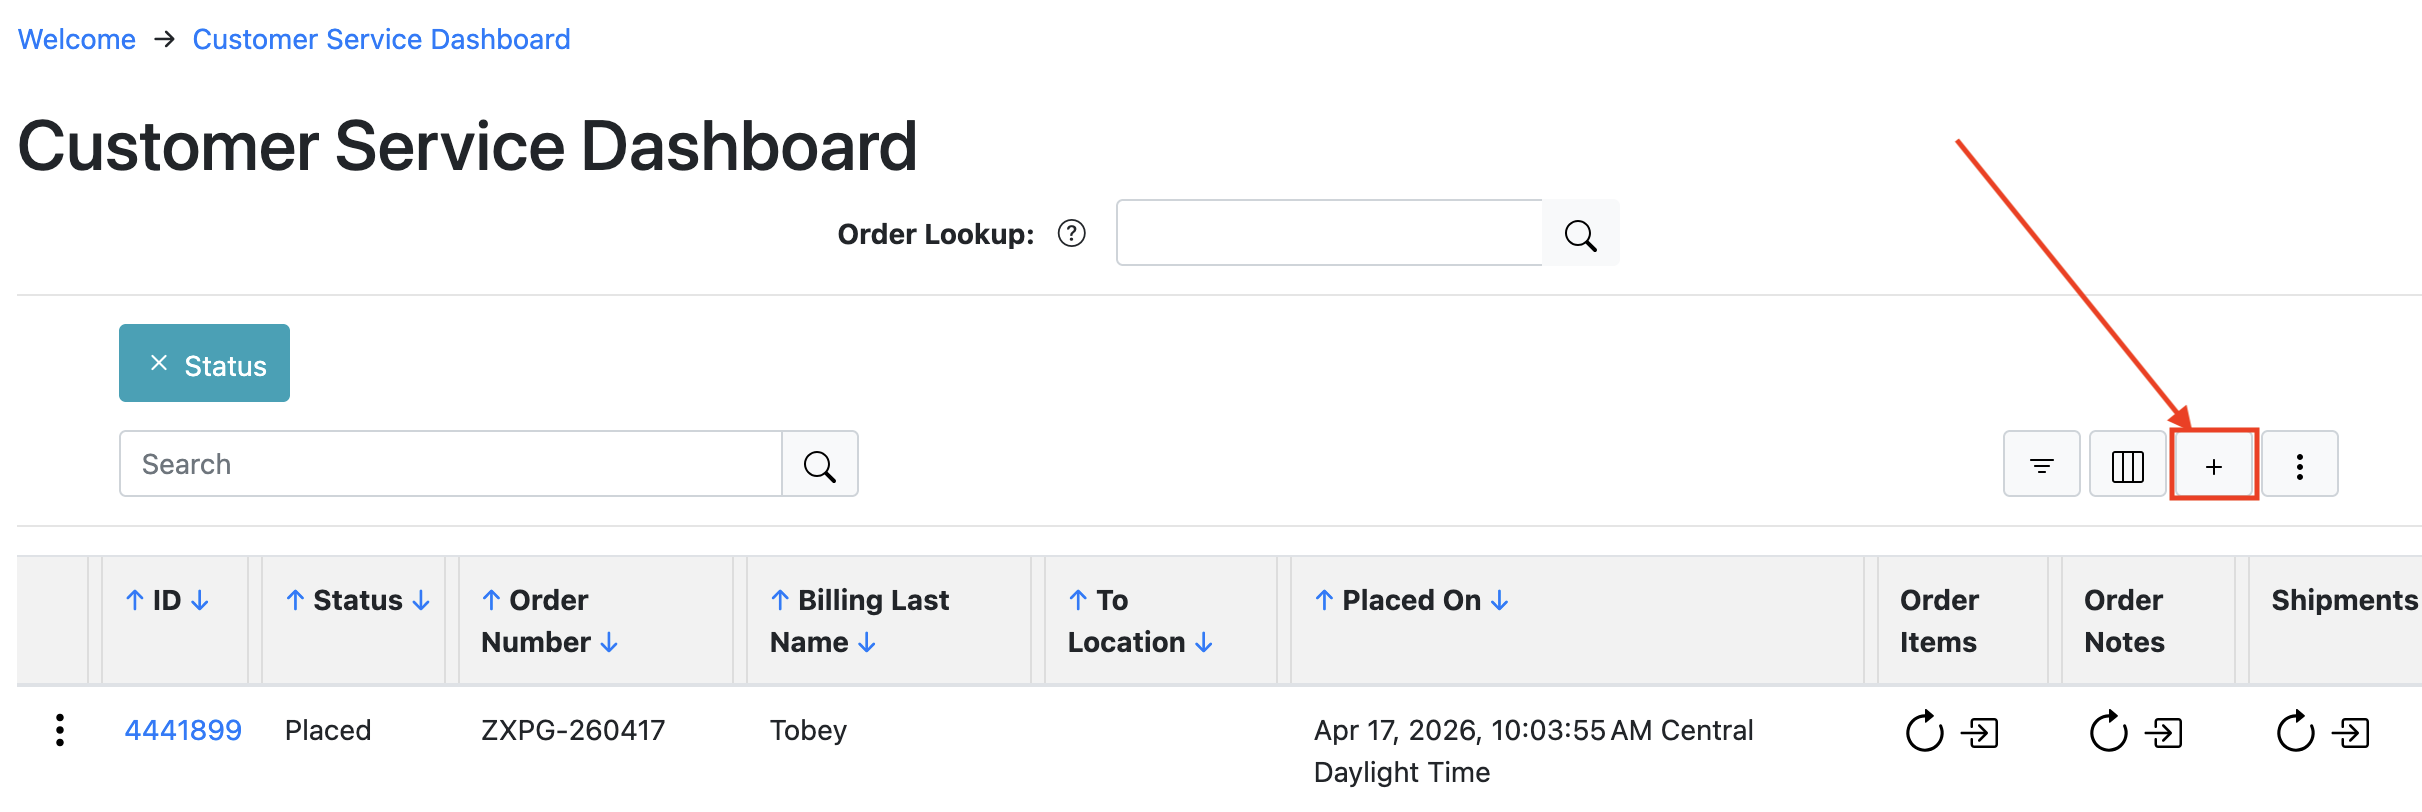
The resulting form provides a couple options to make it easy to jumpstart the new order:
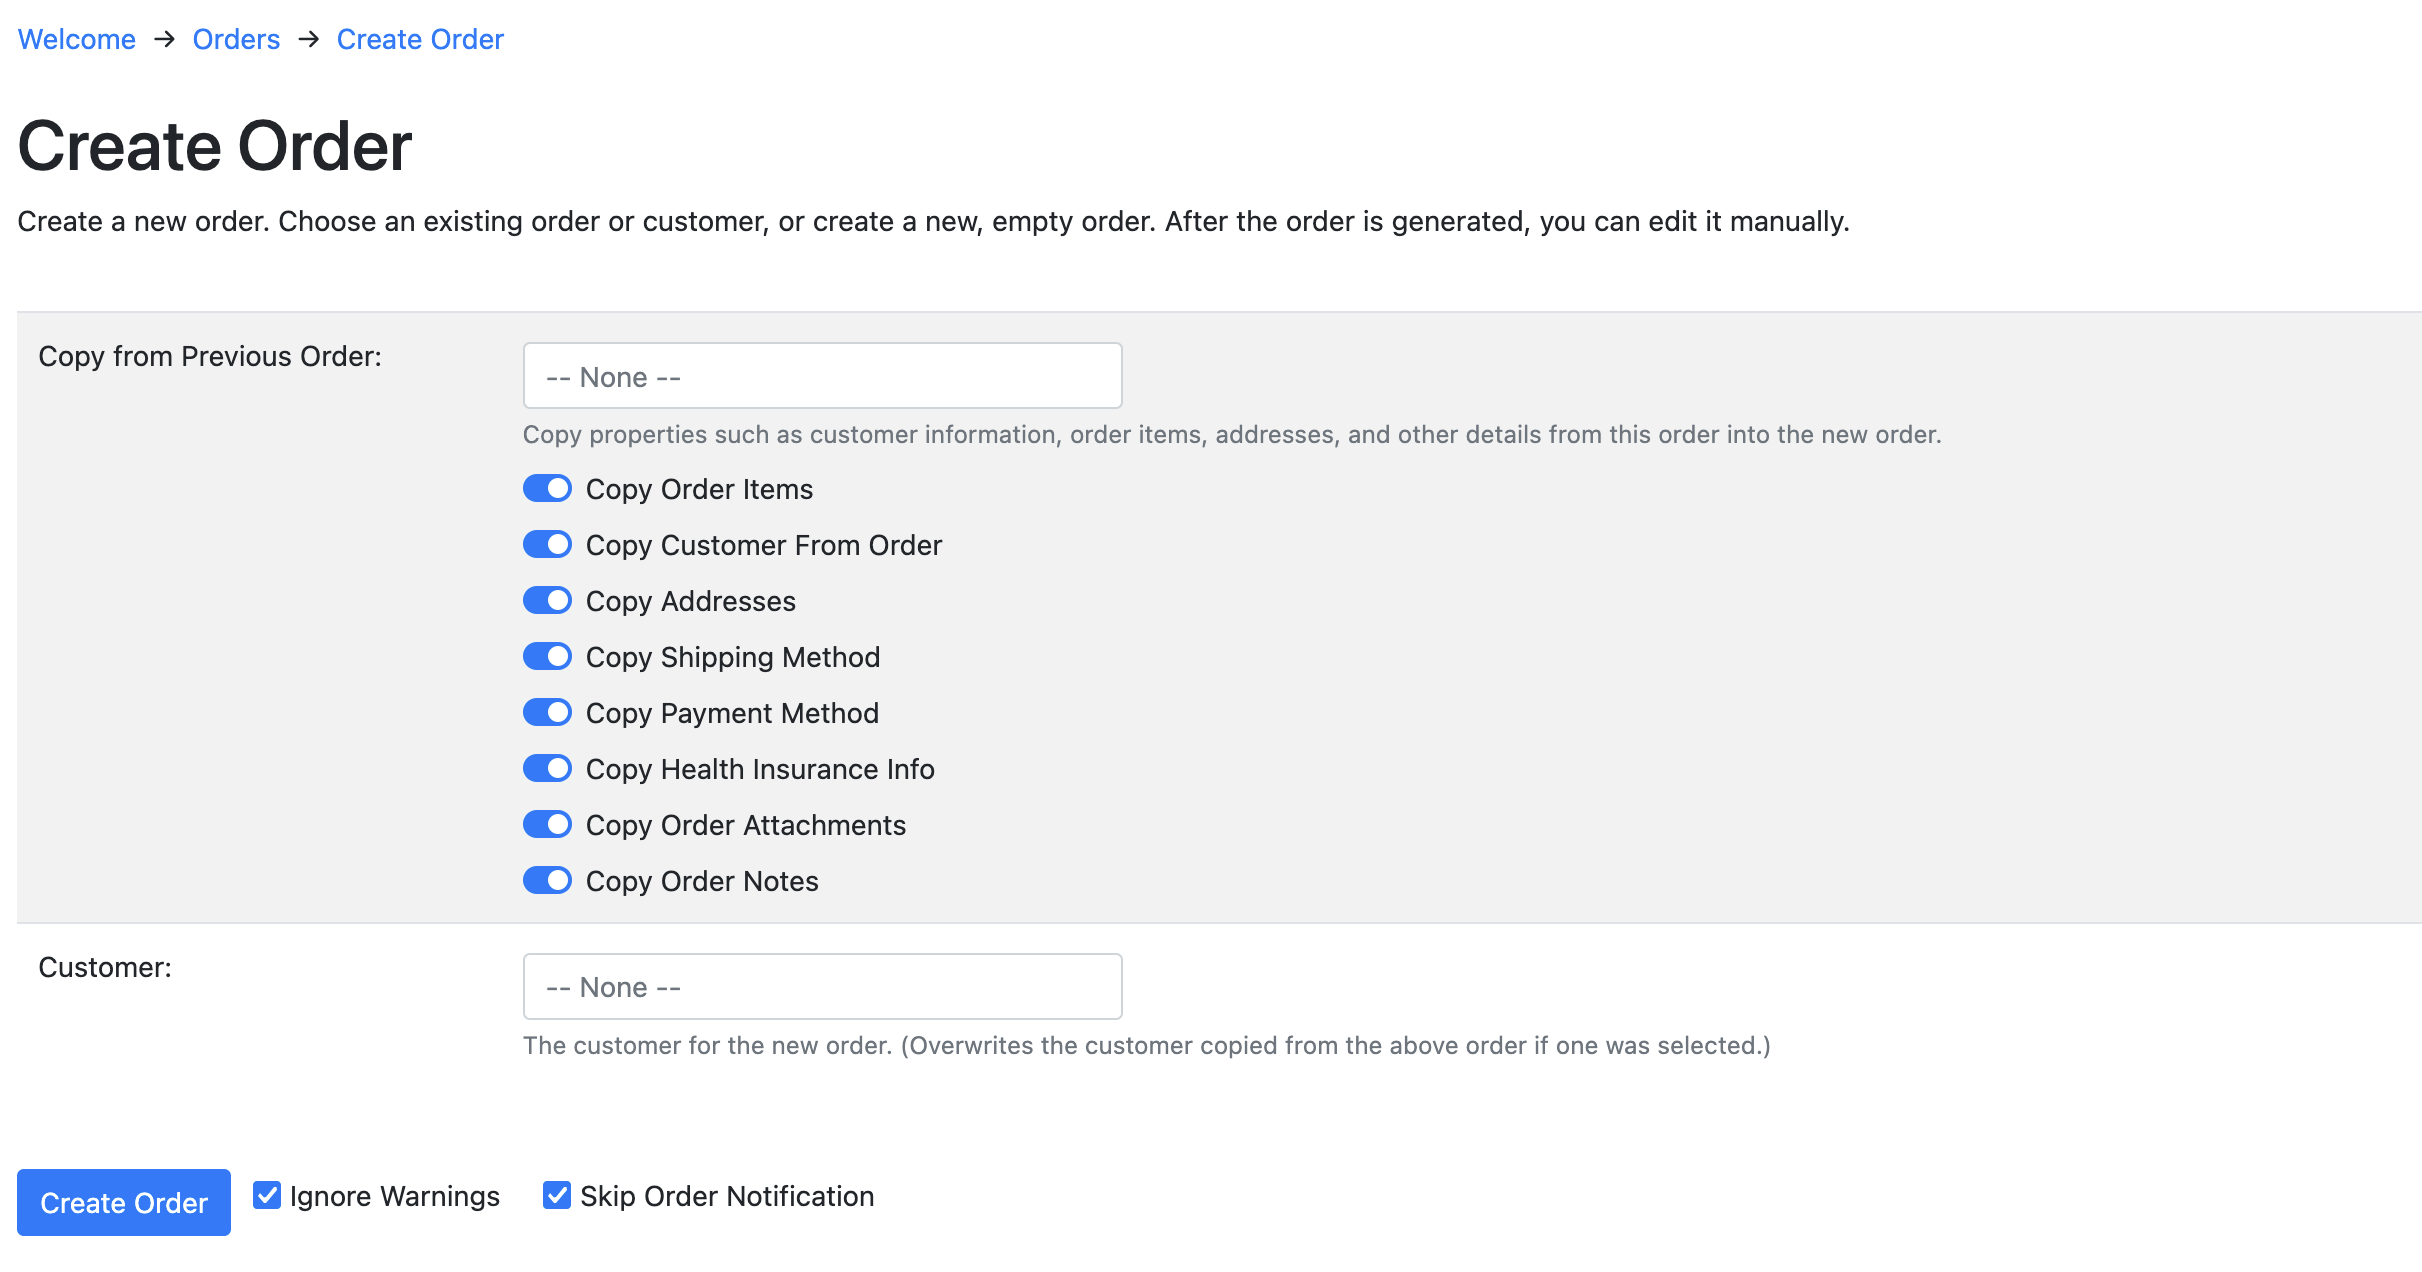
Copy from Previous Order:
This option allows you to use another order as the basis for the new order. It can be useful if you are placing a new order for the same items, or the same customer. After selecting the previous order to copy from, you can select or deselect all various options underneath the order to copy, or not to copy, including: order items, the customer, addresses, the shipping method, the payment method, order attachments, and order notes.
Customer:
This option lets you select a customer record for the new order. If you select this, the new order will be associated with the customer. It will also copy the customer's billing and delivery address into the new order if they are defined under the customer record. Note: even if you have selected a previous order to copy a customer or addressses from, selecting a customer record here will overwrite the order's customer record and addresses.
Note about copying the payment method:
If you choose to copy a previous order's payment method, the new order's payment method will NOT actually be used. (Ie, no money will be collected.) This is left as a separate step after the new order is created. For Authorize.net payments, if a customer profile was used in the original order, the profile id will be copied into the new order. This allows you to capture the payment for the new order easily, under the Payments and Totals section of the new order (see below).
Note about "Placing" the new order:
If no payment is required for the new order, the system may go ahead and "place" the order. This could be the case if there is no dollar value attached to the new order, or if payments are not required according to your settings. This simply means that the system will assign a new order number for the order, and change its status to Placed. In all other cases, the new order is not "placed," however, a button will appear at the bottom of the subsequent screen allowing you to manually "Mark Order Placed":
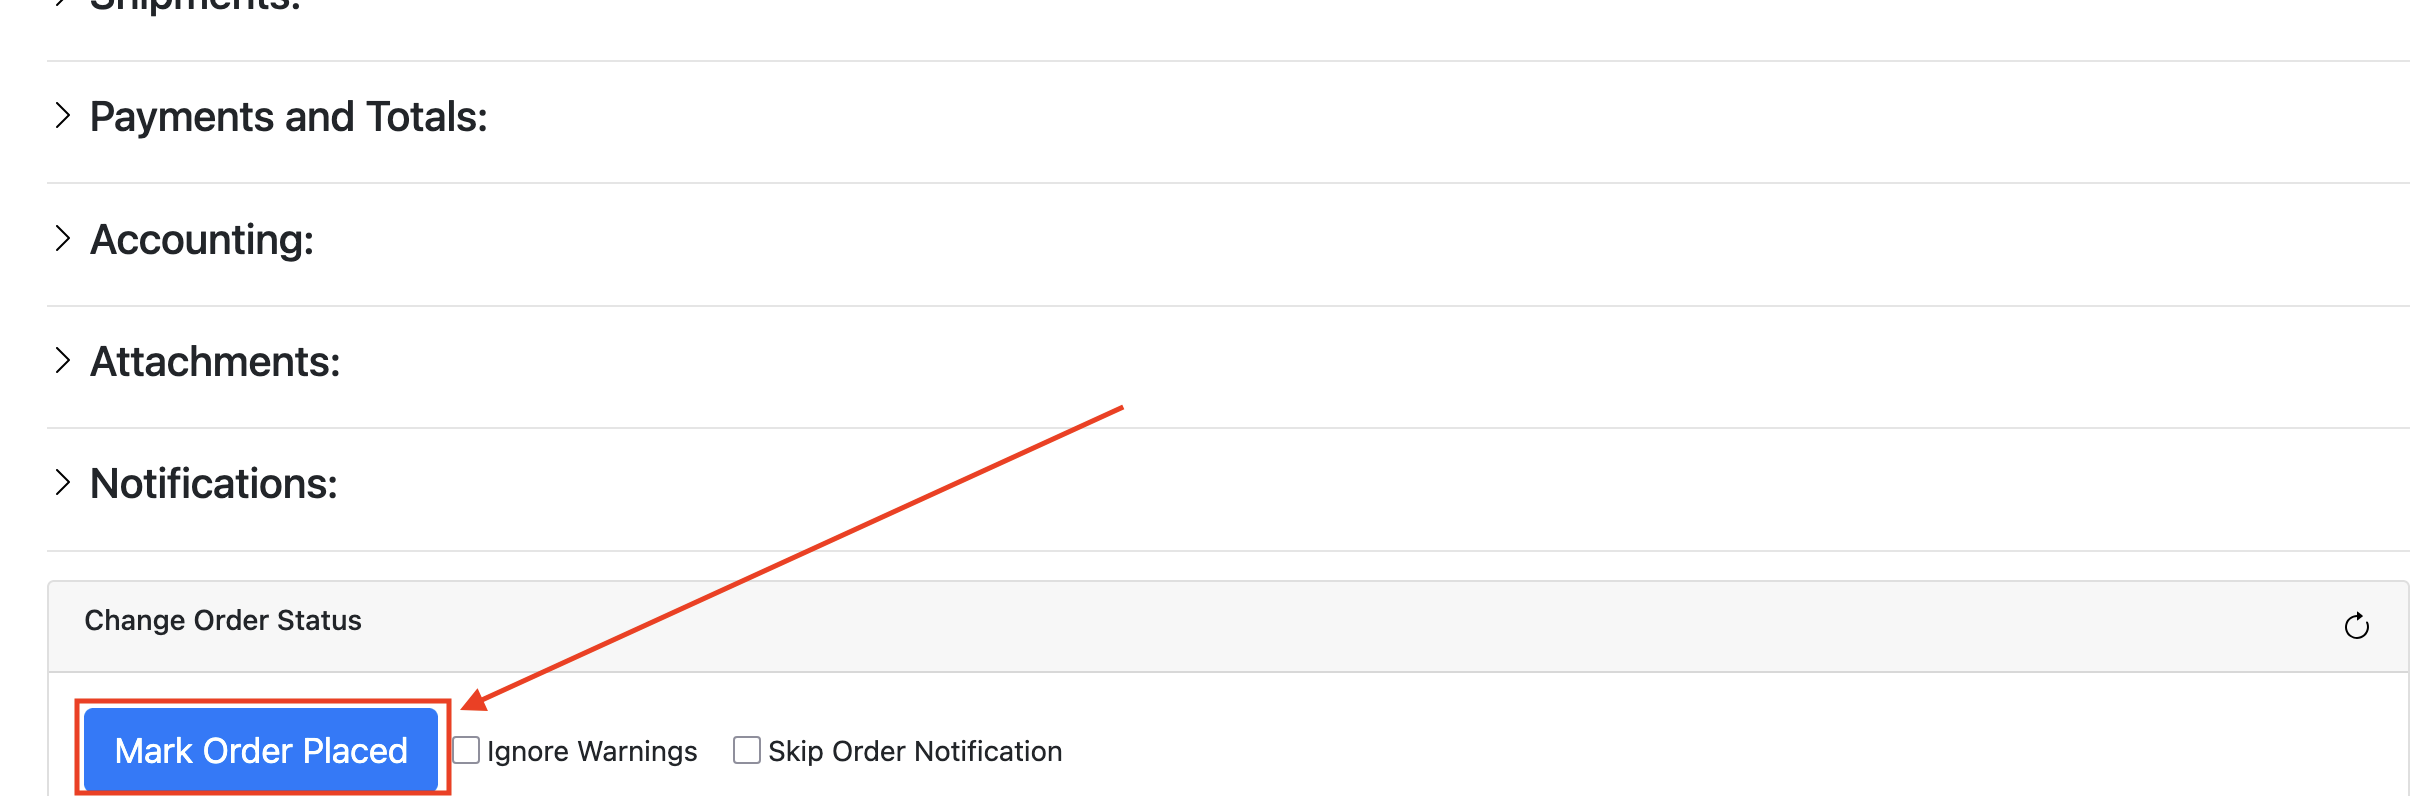
Clicking that button again simply assigns an order number to the new order and changes its status to Placed.
This is intended to give you the best balance of convenience and flexibility when creating new orders.
In all cases, as soon as the new order is created, you are able to use all of the functions described below in the Customer Service Form, to further manipulate and process the order.
The Customer Service Form
Completing the Create Order process, or clicking into each order from the Customer Service Dashboard, takes you to the main Customer Service Form for that order. This is the one-stop shop for making any administrative changes you need to, to the order. If you are in communication with the customer, you can change just about everything associated with the order, including:
Adding and removing items
Changing the selected shipping option
Adding fees and discounts
Adding shipments with tracking numbers, and creating UPS labels
Capturing or voiding the payment for the order
Sending or resending email notifications
Other administrative functions such as: adding notes and attachments to the order, and synchronizing with accounting systems (QBO)
In the following sections, we'll dive a little deeper into the key functions of the Customer Service Form.
Adding, removing and editing order items
Open up the Order Items section to view and edit the items that are part of the order. Not only can you add new items, you can also edit the quantity and attribute selections of existing items, as well as remove existing items. Every action you take will automatically update the order's shipping cost, tax, and total. (It does the math for you.)
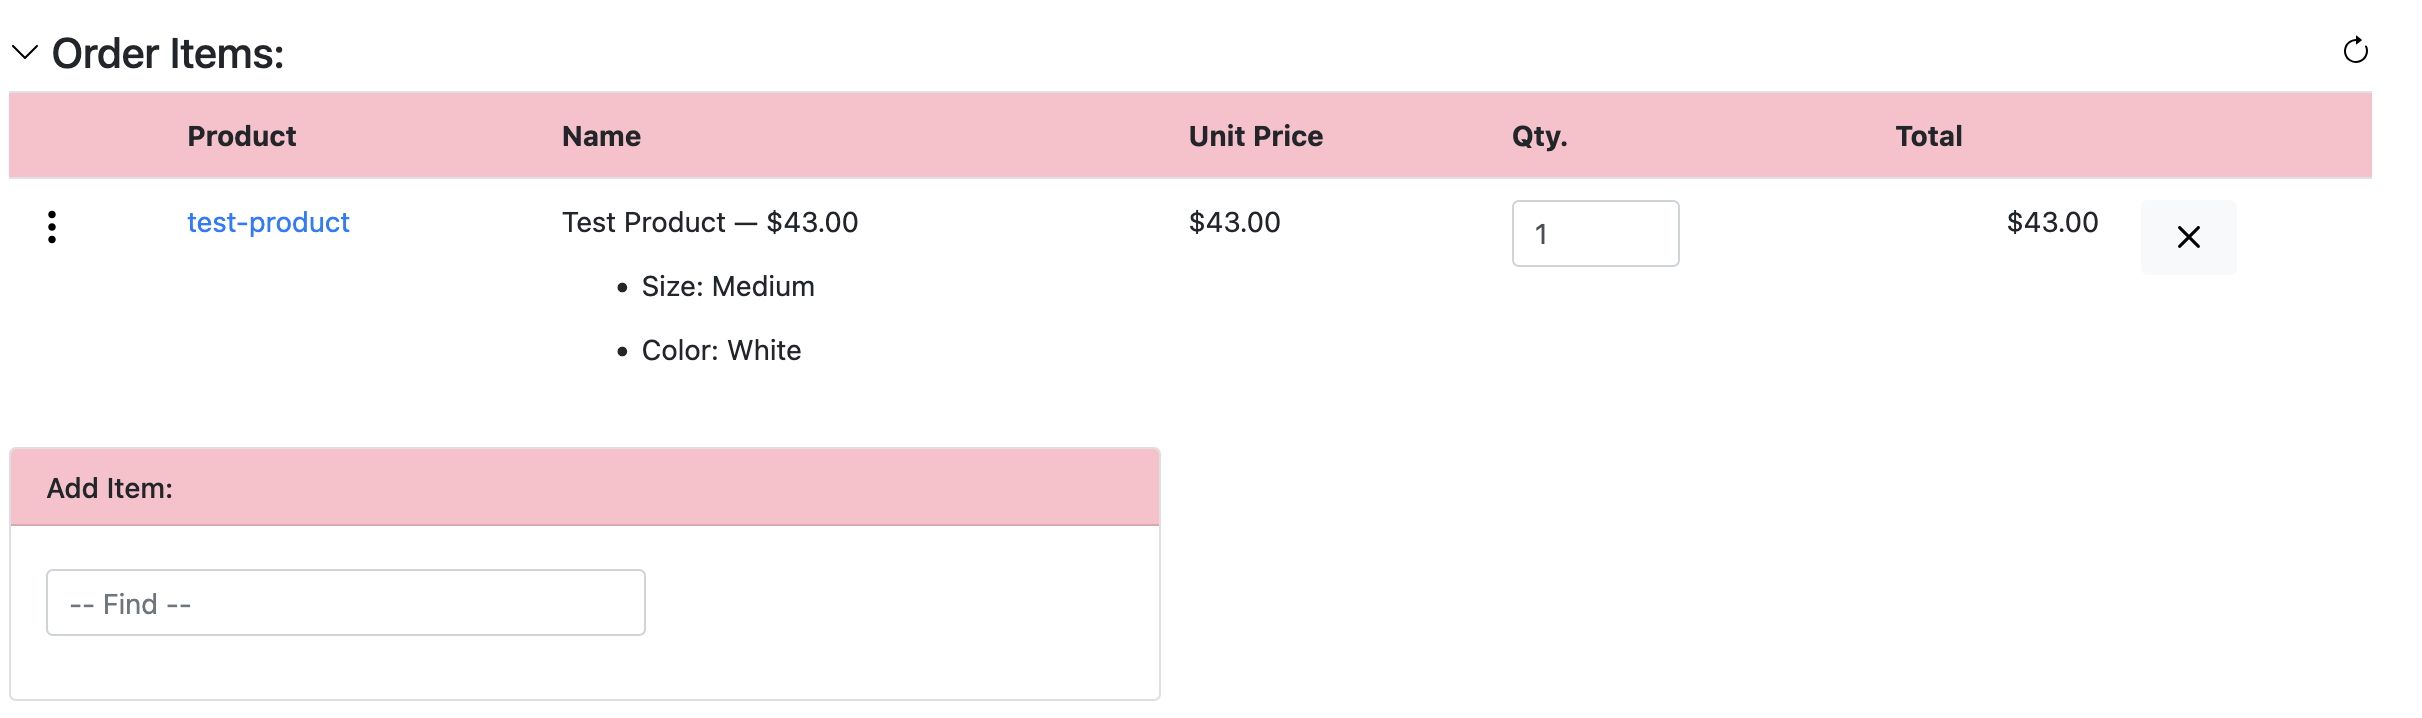
Note: to change an attribute selection (in the above example, Size or Color), hover over the attribute and click the pencil icon that appears.
Changing the shipping option
At the top of the Customer Service Form, if applicable for the order, the selected shipping option and cost appears. You can change the shipping option by hovering over the selected option and clicking the pencil icon. When you do this, the system will populate a dropdown menu with each of the valid shipping options and their costs, allowing you to change it:
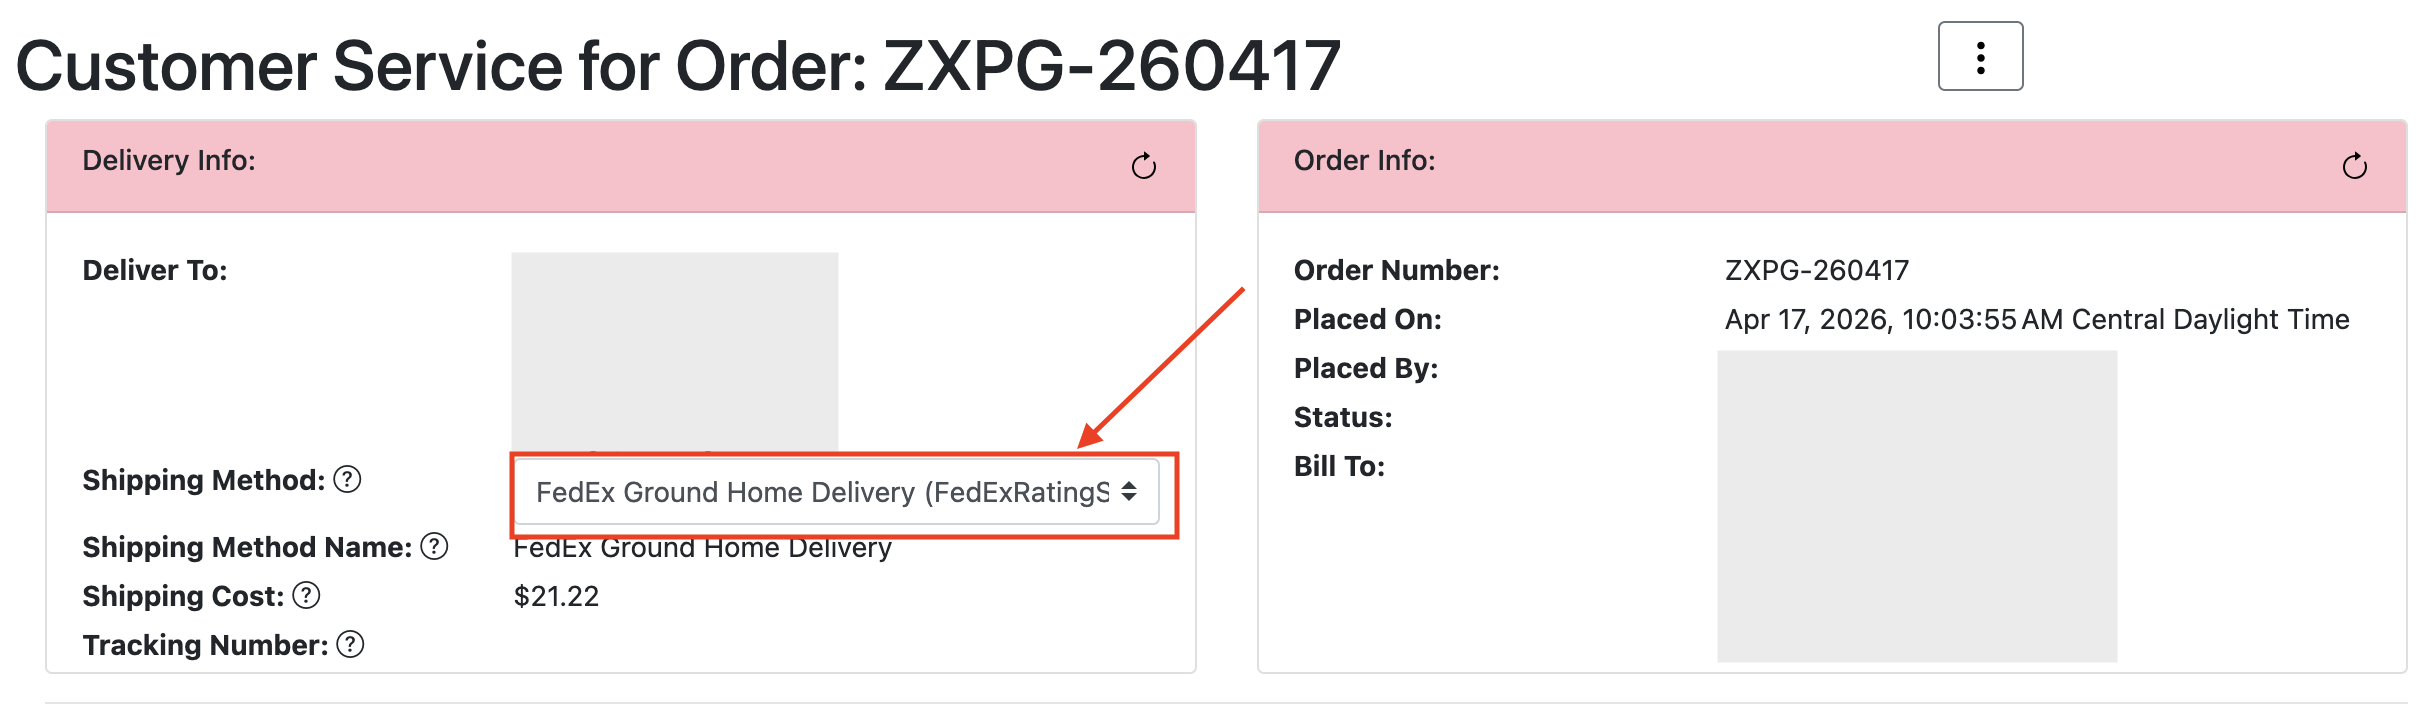
You can also manually set the shipping method name and manually set the cost, using the fields immediately under the "Shipping Method" field. In either case, if there is a different cost for shipping because of a change you made, the system will automatically recalcuate taxes (if applicable), and recalcuate the order's total.
Adding fees and discounts
The Fees and Discounts section allows employees to add any sort of additional fee, or a discount, to the order. This can be useful to cover any special situation where the customer is owed money on the order, or where the customer needs to be charged something extra. Adding these fees and discounts will tell the system to automatically update the order's totals.
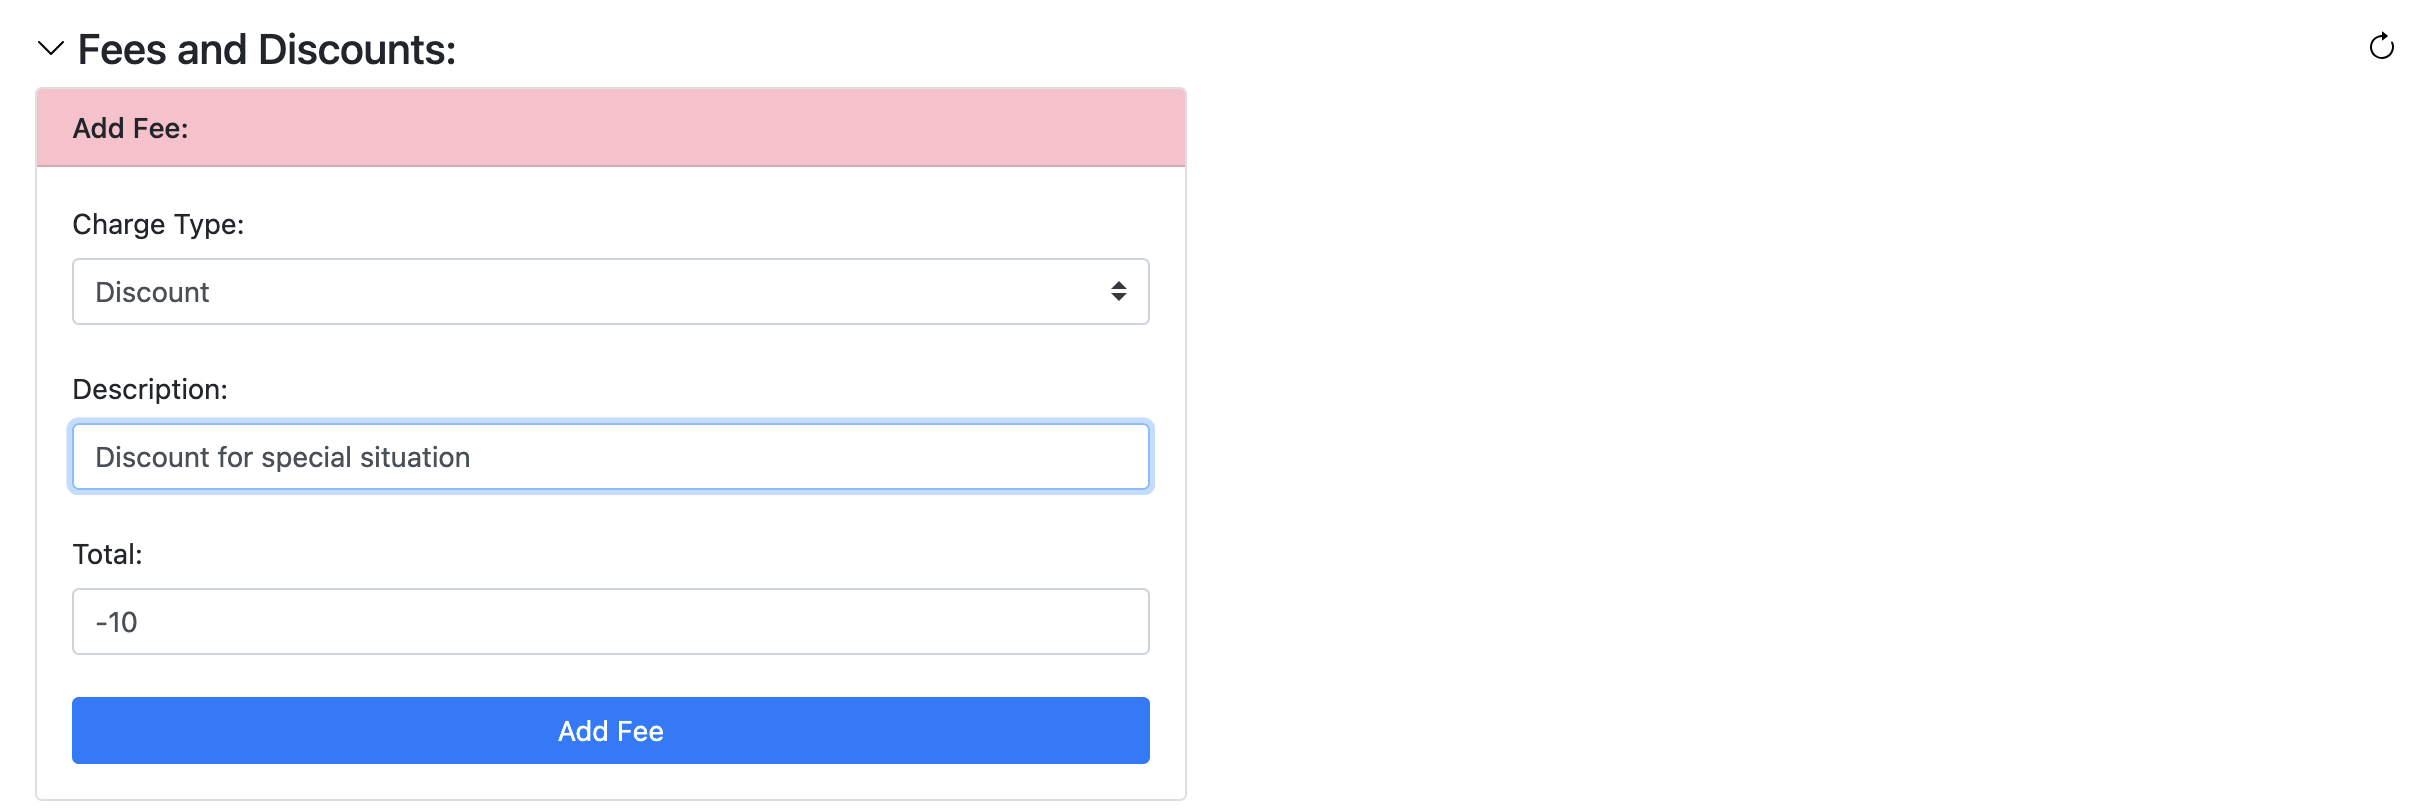
Note: if you are adding a discount, be sure to enter the total as a negative value so the amount is subtracted from the order's total.
Adding shipments with tracking numbers, and creating UPS labels
Under the Shipments section, a list of shipments created during the checkout process will appear, if applicable. You may also manually create shipments, and create UPS labels for each one. For more information about automatically creating Shipments during checkout, please visit the Shipping Packages document. For info about how to create UPS labels, please visit the UPS Shipping Labels document.
Capturing or voiding the payment for an order
For full details on capturing, voiding and refunding payments for an order, please visit the Payment Features document. Note that each of the other functions on the Customer Service Form, such as adding new items, or adjusting shipping, may involve a change to the order's total. The Payments and Totals section's "Remaining Balance" field is automatically updated when this happens, allowing you to capture/refund/void the right amounts to reconcile the order.
Sending or resending email notifications
For full details on viewing, sending and resending order notifications from the Customer Service Form screen, please visit the documentation for Notification Features.
Order attachments
The Attachments sections lets you upload files that pertain to the order. For full details, please visit the Order Attachments document.
Fraud and Verifications
In addition to the above functions, another section you can add to the customer service form is focussed on fraud prevention for incoming orders. For full details, please visit the documentation for Fraud and Verifications.